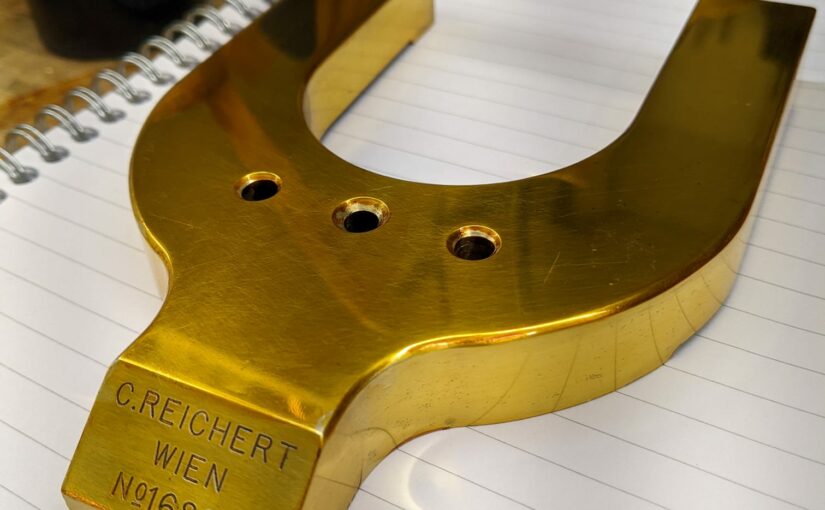
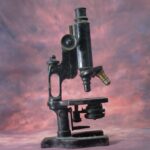
Never, in the history of microscopes has a microscope given me so much trouble. I don’t know why but this piece of a Reichert just did not want to be lacquered. I did it again and again and again. It ran, it dripped, it missed bits. I tried using cloths, pads, brushes, foam, I tried hot, warm and cold metal. The thing was out to get me.
It happens sometimes, you just have a bad day, but the good thing about lacquering microscopes is that if you mess it up you can just take the lacquer off and redo it. Not that that is much comfort on the third day of trying having used up 100 mls of lacquer.
I got there in the end. The Reichert (whose name is Ernie) is now my friend again. Now for the trickier bits.
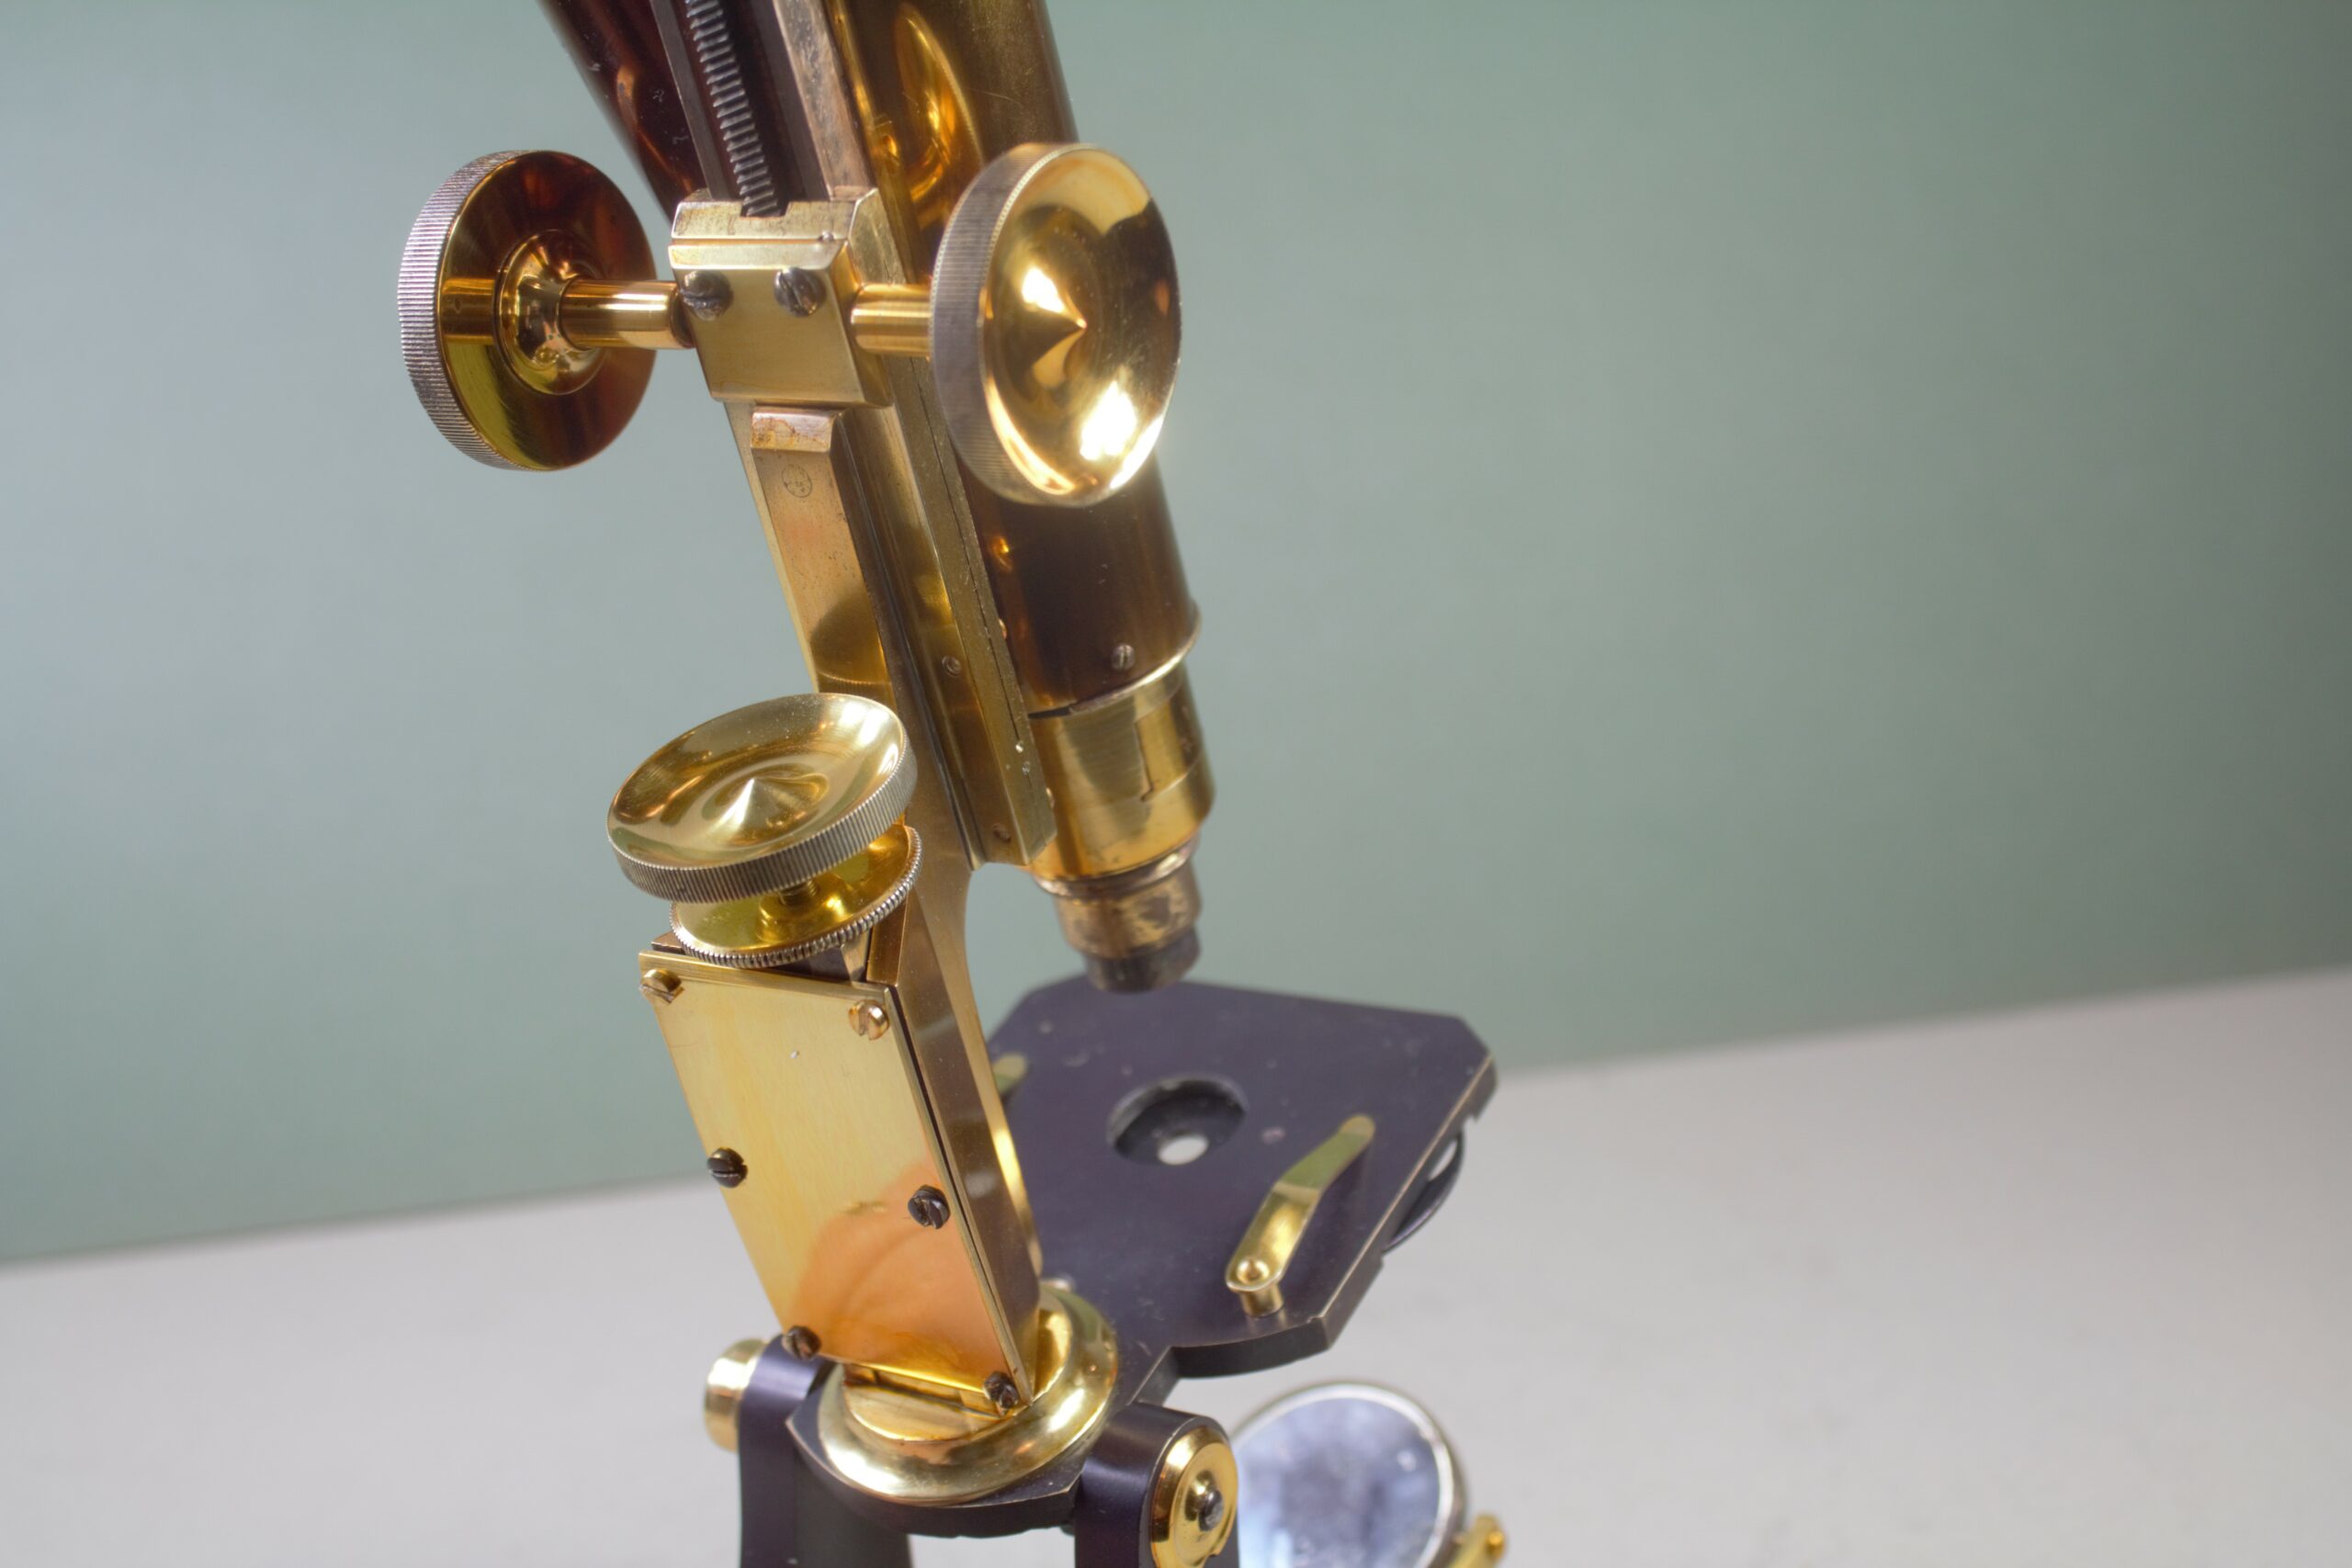
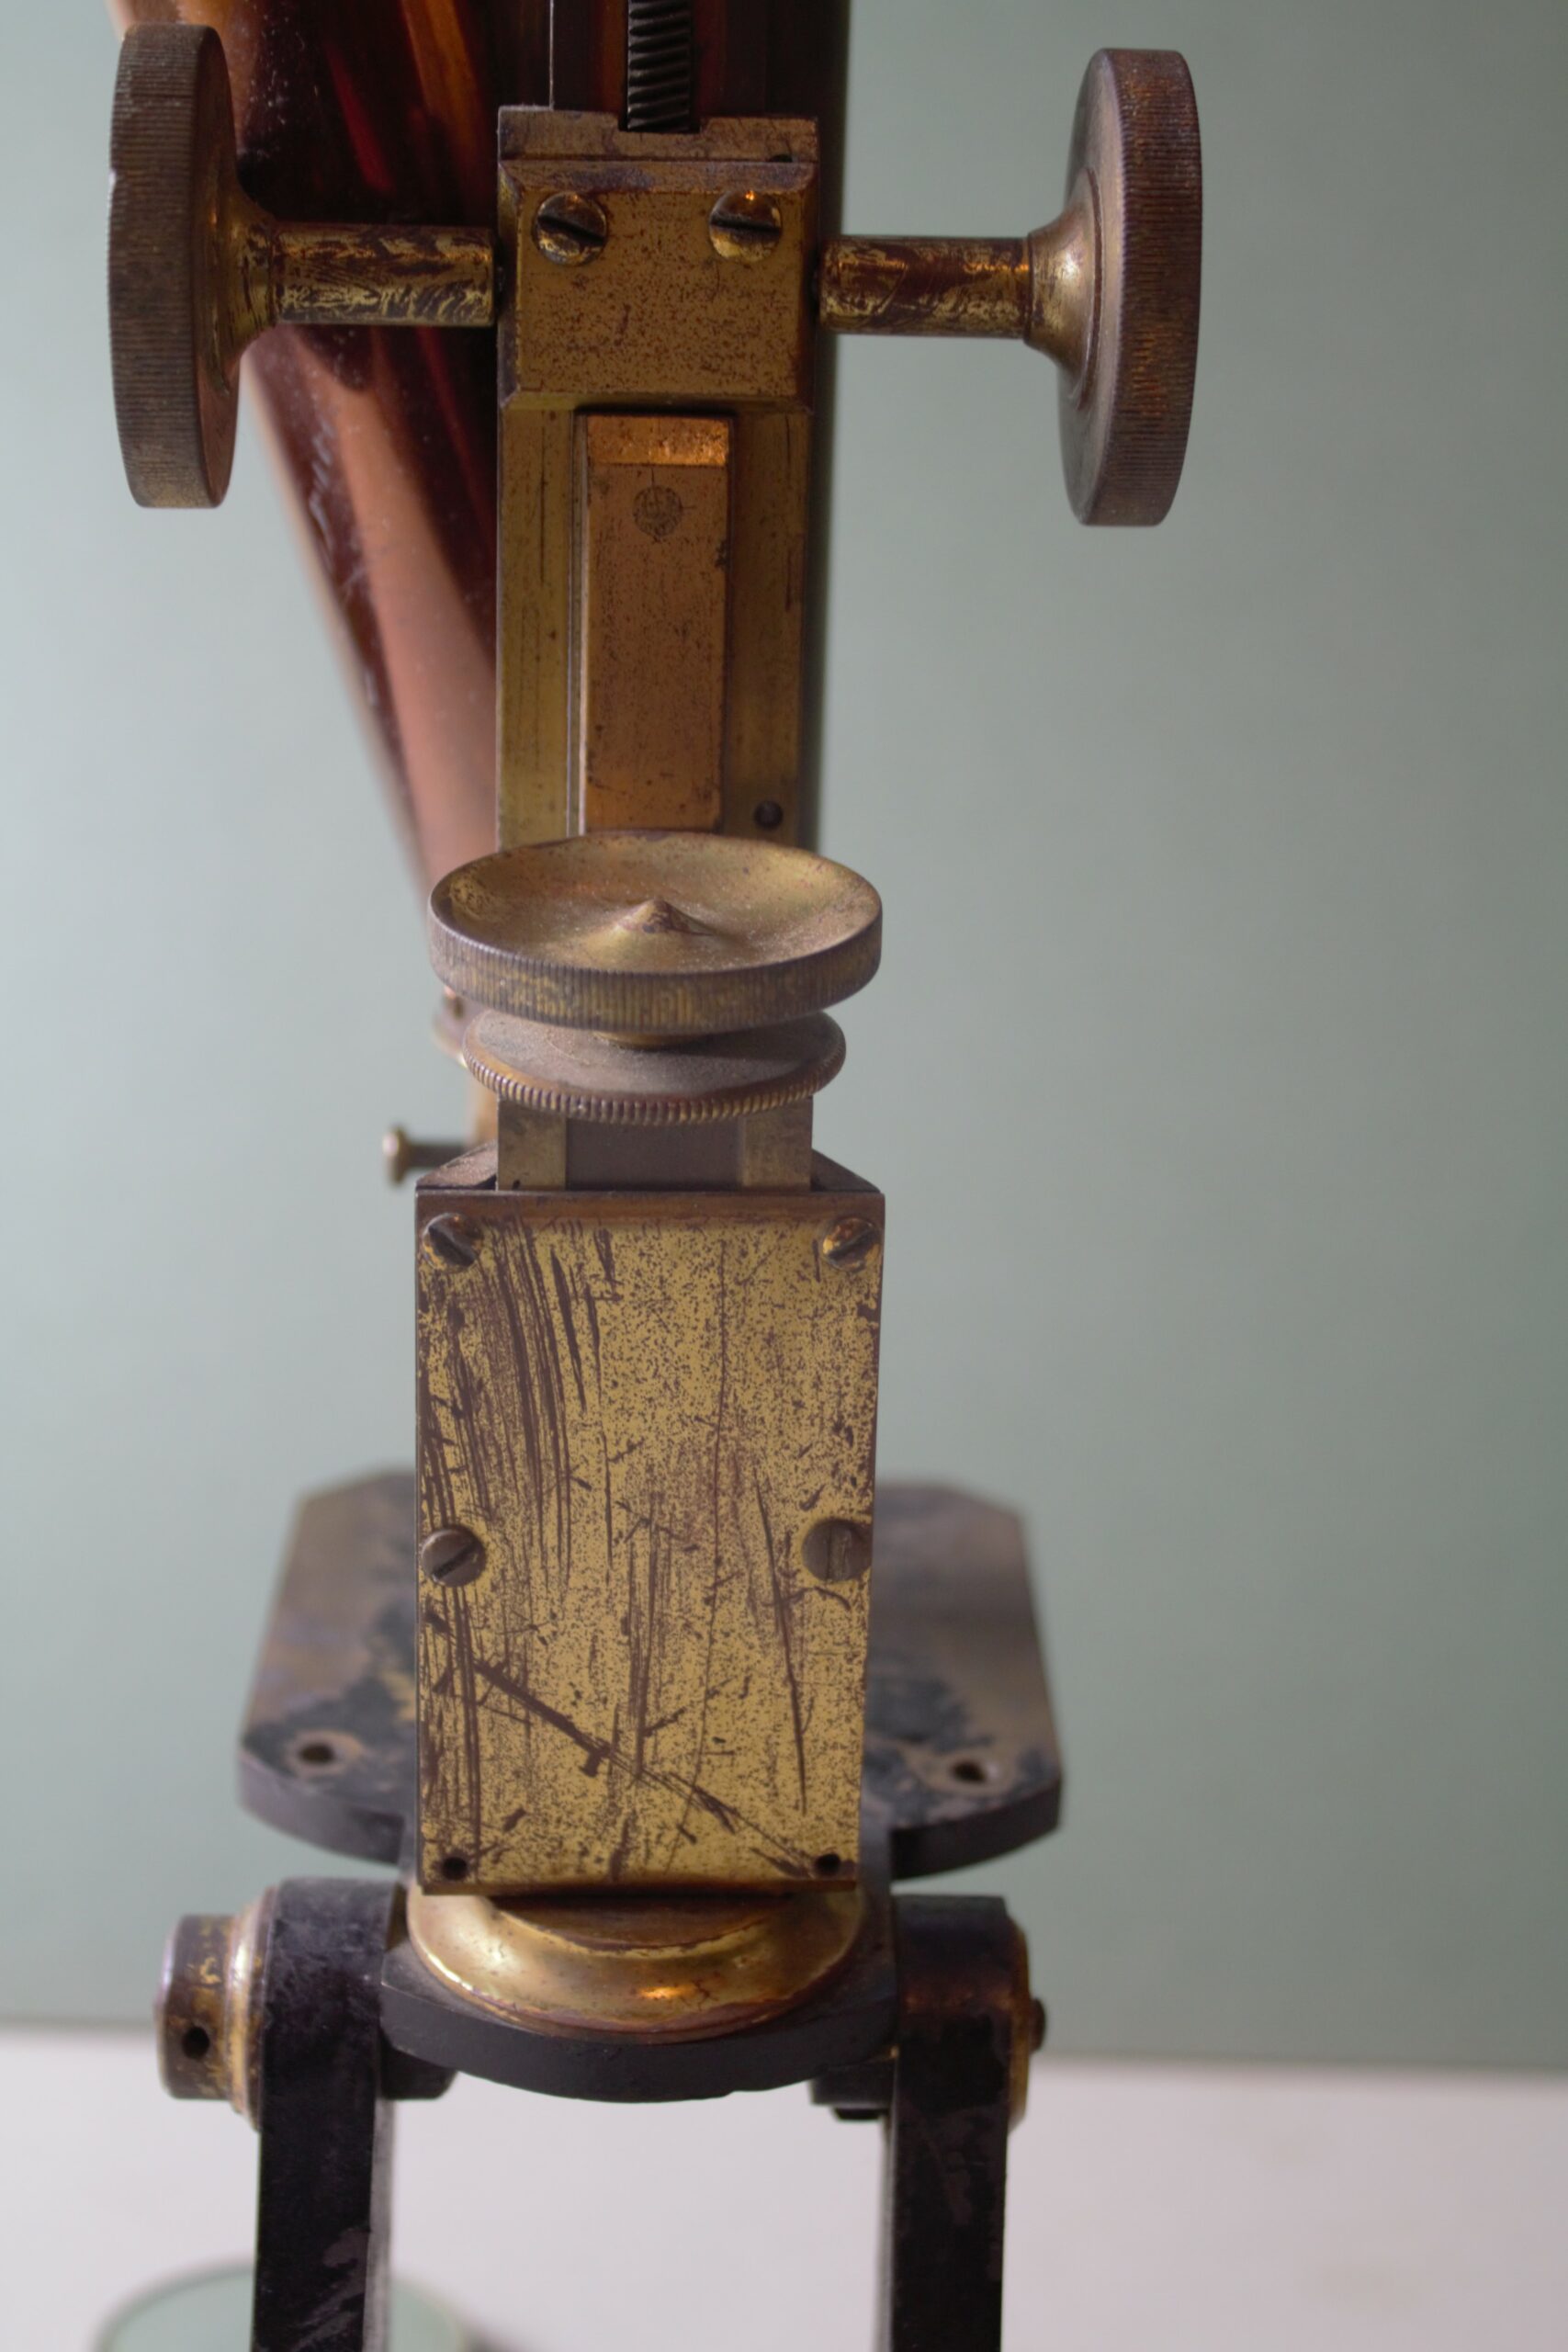
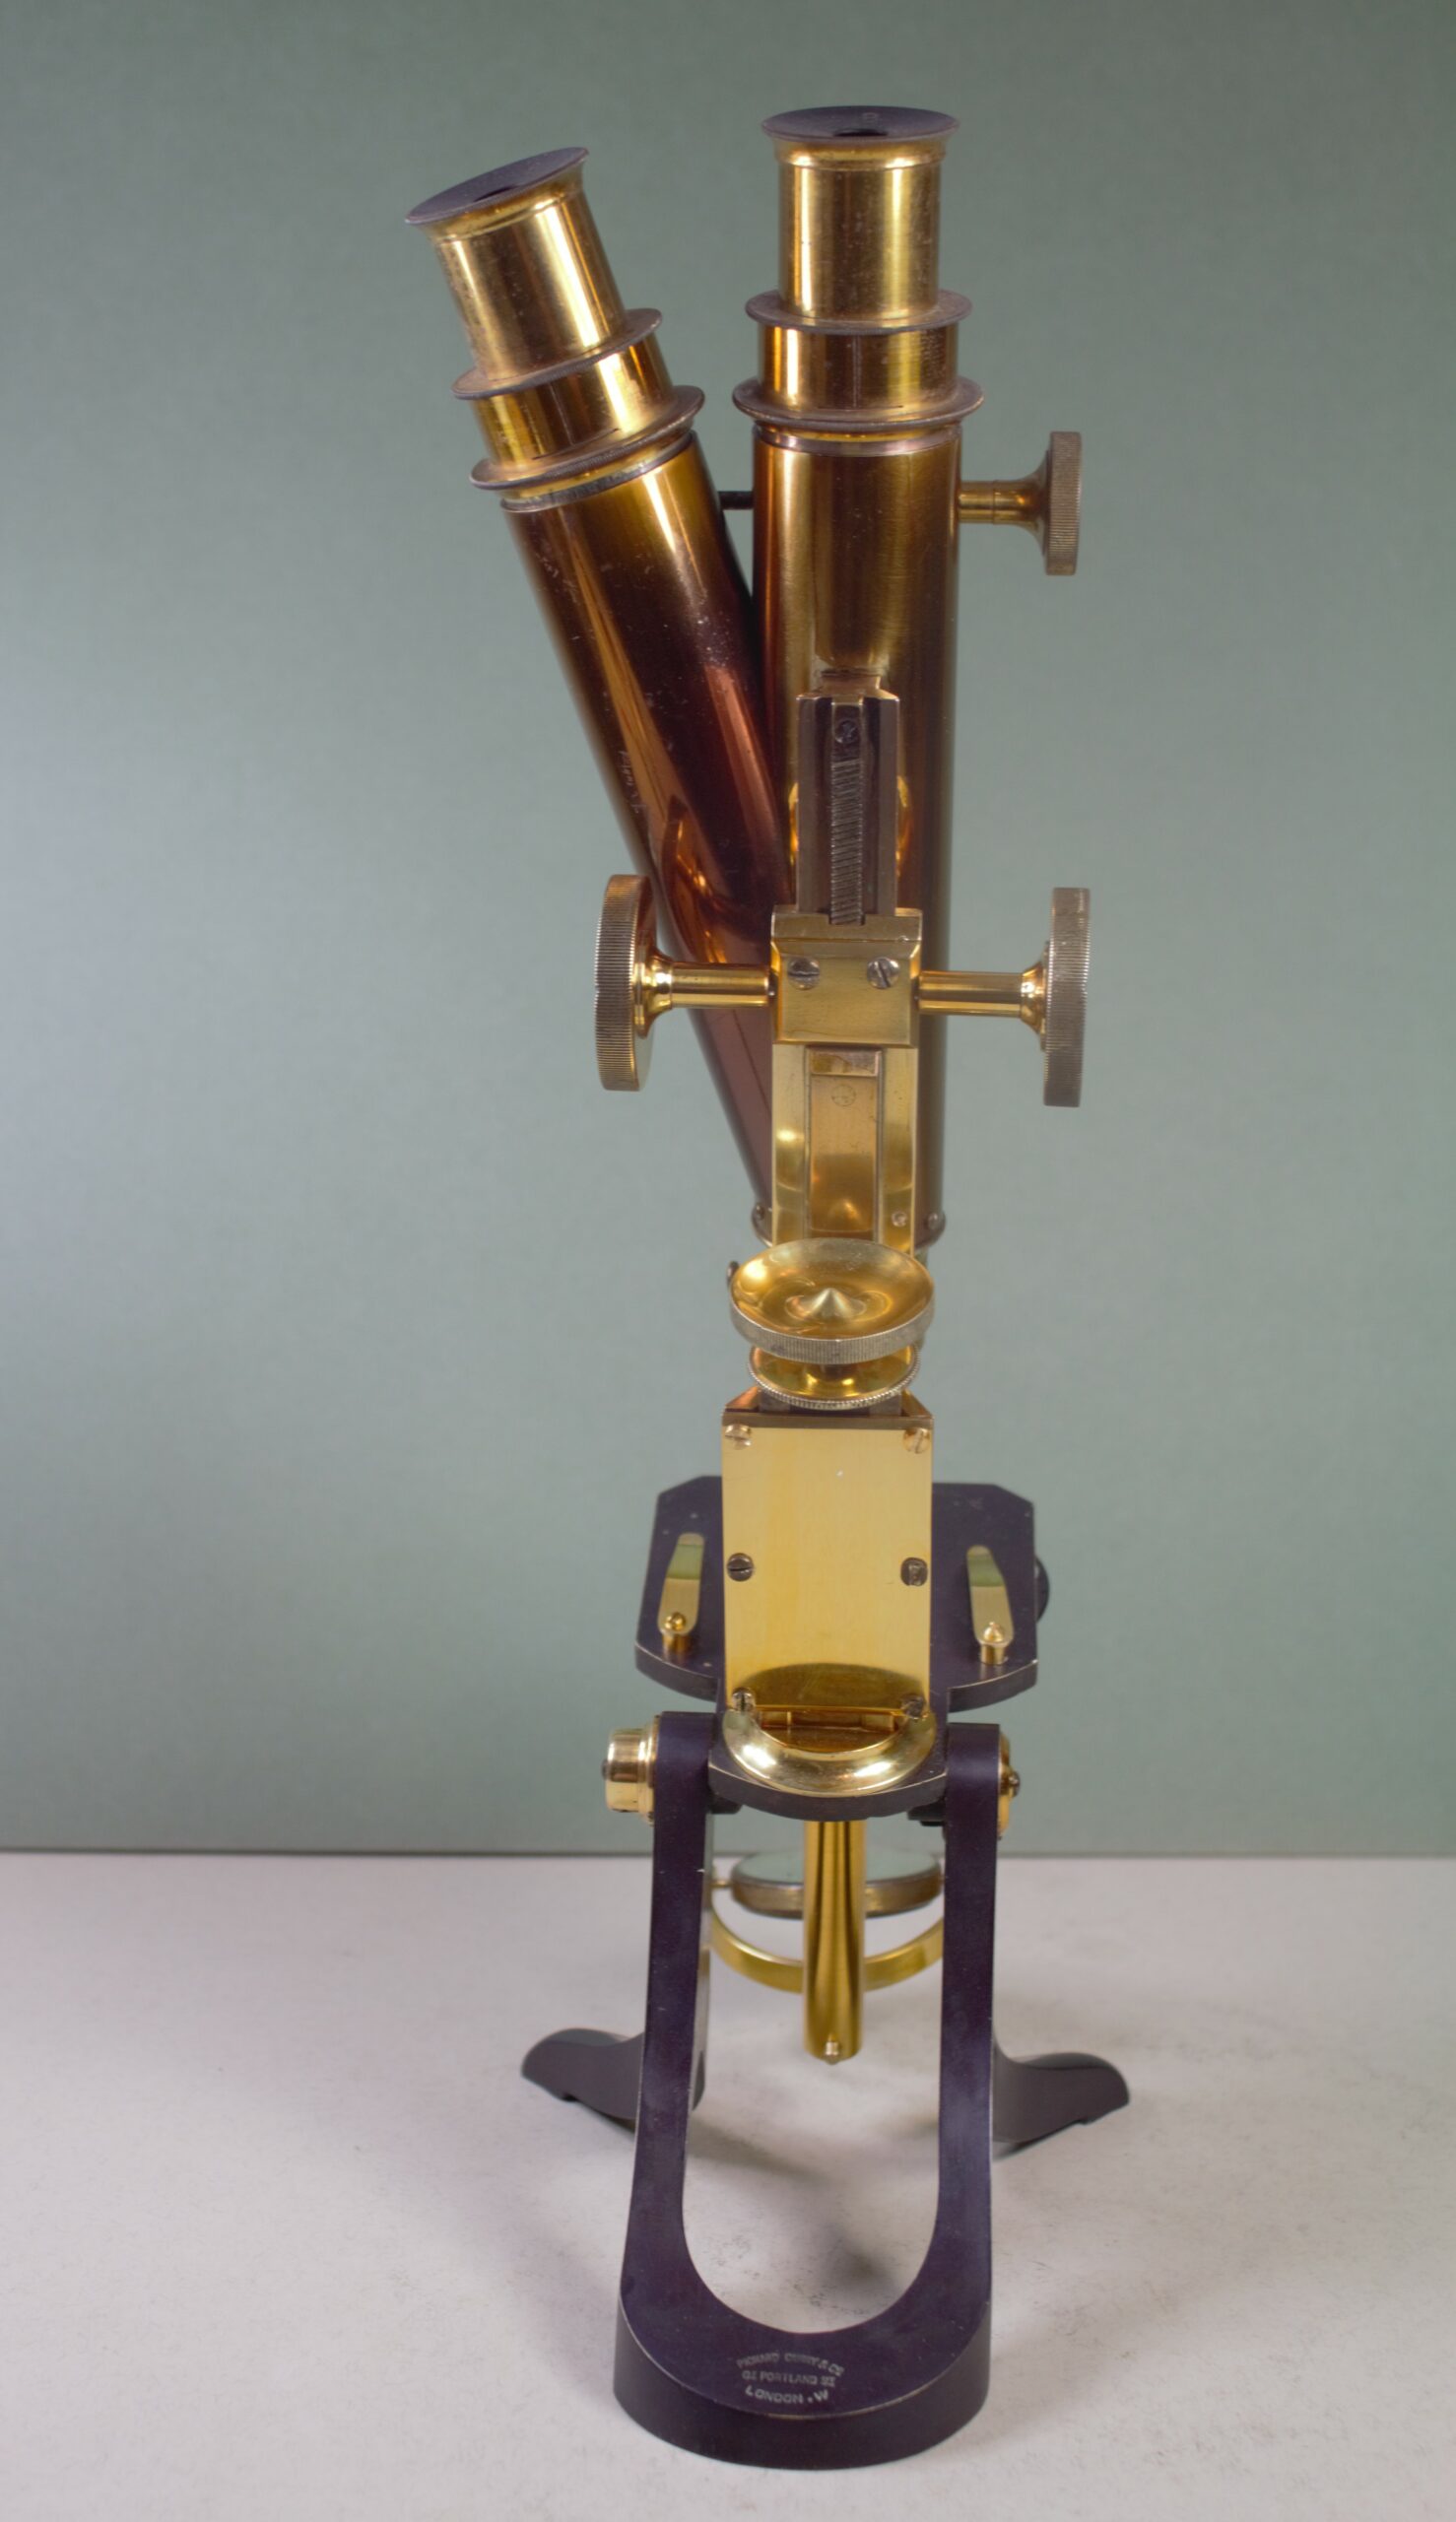
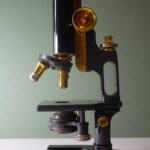
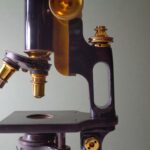
This Henry Crouch had been converted from monocular to binocular at some point in its history but the additional tube had never been lacquered. The lacquer on the original tube was mostly intact apart from a few knocks and bumps so it was only necessary to lacquer the one, unlacquered tube. The original lacquered tube was a beautiful colour, a rich yellow with a hint of chocolate brown. I was somewhat surprised when I saw this microscope because I have never seen such an eye catching colour before. The photos don’t do it justice, in some lights it appears chocolate brown and in other lights it appears yellow. I did wonder if I would be able to match the colour when I first saw it but the use of aniline dye made it much simpler than I first feared. Henry Crouch microscopes often used aniline dyes. The rest of the microscope was lacquered with yellow, a lovely two-tone specimen.
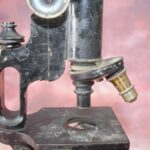
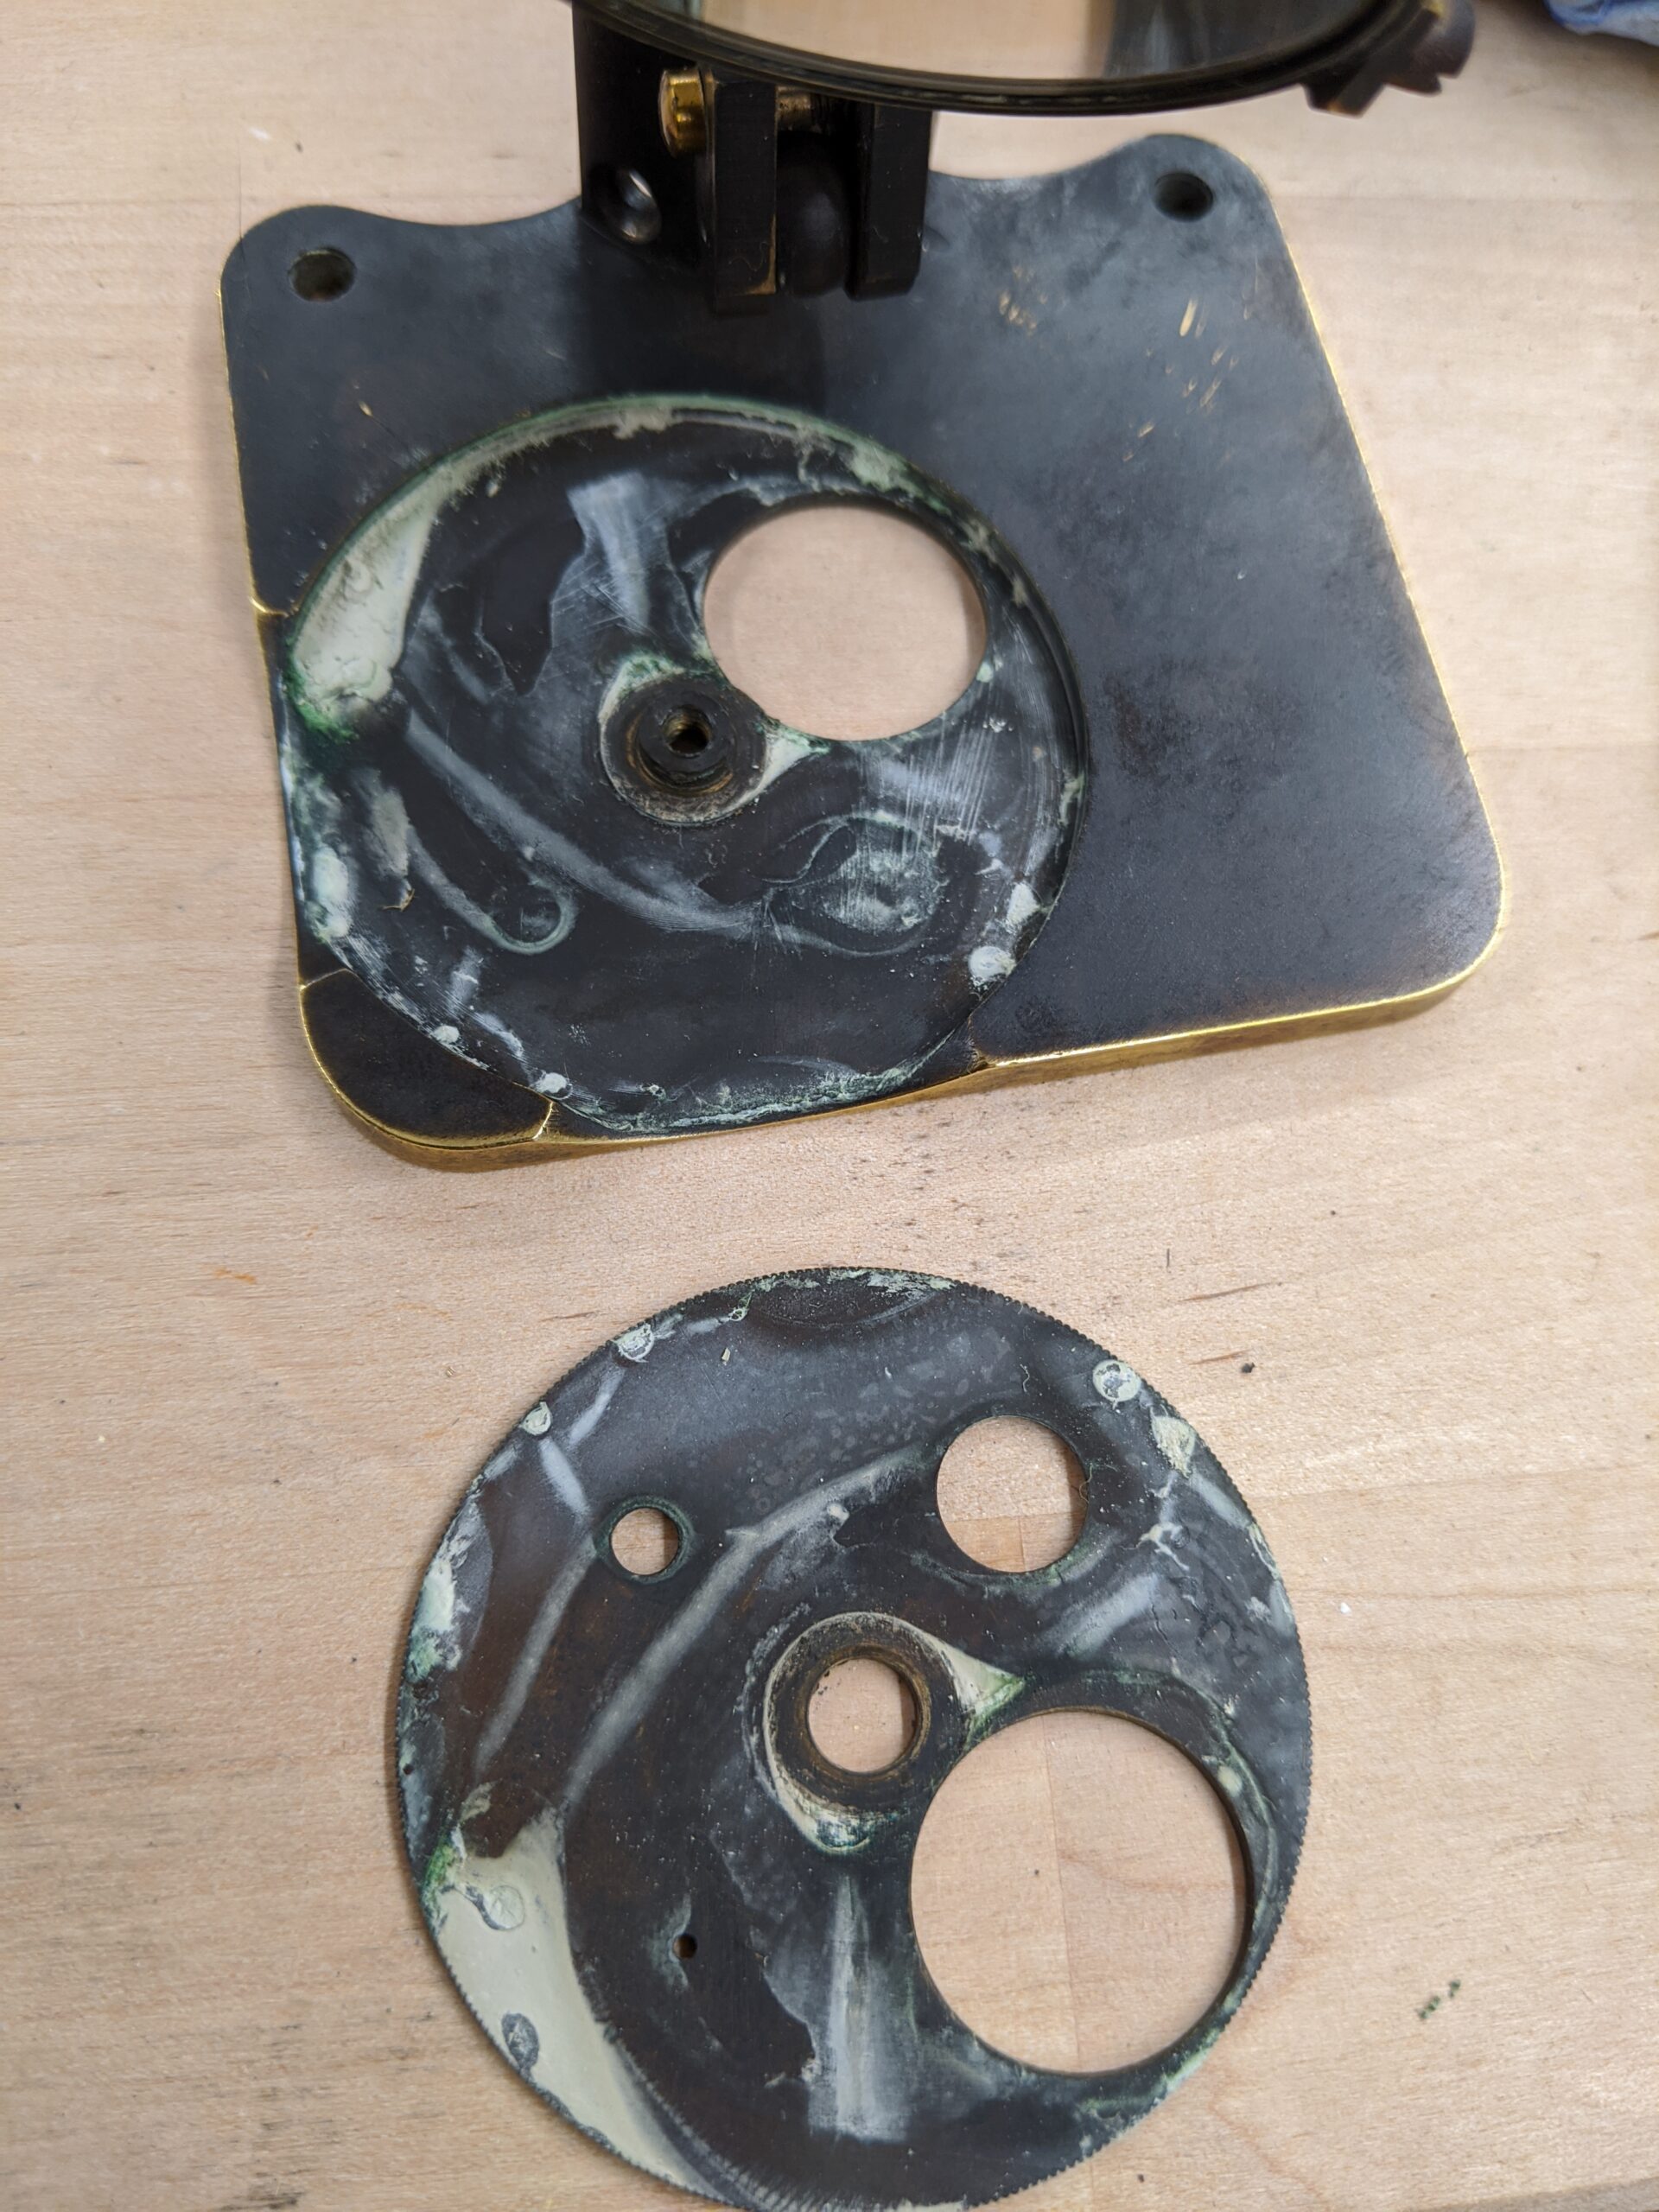
The microscope was missing an aperture wheel and tensioning screws for the rack. The mirror gimbal was broken in two (held together with string) and the mirror holder was thin and cracked. I made new screws, stage clips, an aperture wheel and a mirror gimbal and holder. The stage had lost all its colour so that was blackened and the foot which had peeling paint on it was stripped and chemically blackened as it would have been originally. The rack now moves as it should and it looks very smart indeed. The before and after pictures are below
The Spencer is complete. If you recall, this poor Spencer had been spray painted black from top to bottom including the condenser, objectives and brass areas. It was quite a job to remove the spray paint and restore this but I’m really very pleased with it. The new paint is not perfect but it is much improved. The spray paint had been removed from the condenser iris and that is now moving smoothly and all in all it looks and functions very well. The knobs and brass areas had the spray paint removed and were relacquered with a rather lovely deep gold colour. My family are quite taken with it and they are usually somewhat immune to the charms of microscopes.
I just need to make a mirror for it, that’s on the to do list.
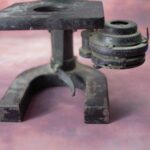
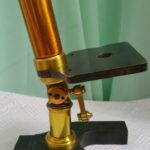
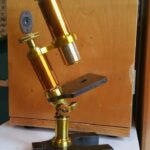
Slowly but surely the Ross is coming together, literally. I have reassembled the base. It’s much shiner now. You can see that it is not going to look “as new” the pitting is too deep, and I don’t want to destroy all signs of its history by sanding it heavily. In this case to do so would be to remove enormous amounts of metal and it is really not possible. To get the name plate to a perfect finish would result in the removal of the engraving which obviously would be foolish. The pitting is still present in places but the corrosion has been treated so it should be good for another 100 years. There’s still lots to do though and this microscope is definitely one of the worst I’ve done, it’s in a worse state than my experimental Dunscombe which was black all over when I got it. Each piece is taking hours of work. It is enormously satisfying though when it starts to take shape. Onward and upward – the tubes are already done so really I’m heading middle-ward, to the REALLY tricky bits.
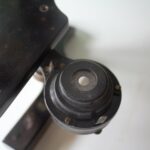
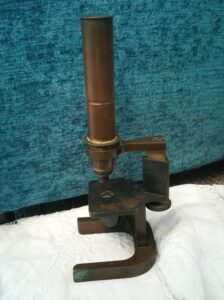
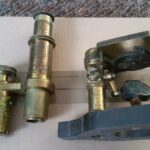
Oh the poor little Verick! In a photograph there didn’t seem much wrong with this Verick apart from the total lack of lacquer but it had serious issues. The Tube holder was stuck fast, the tube was stuck fast in the tube holder and it took several hours to get it all unstuck. The cause? Brasso. Don’t use brasso on your microscopes, it removes the lacquer and clogs up the moving parts it’s like glue. Below is a picture of the aperture ring which was also stuck fast and what it looked like inside when I finally got it apart.
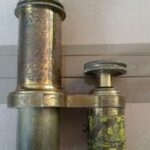
There is hope though, if you can get the microscope apart the brasso can be removed quite easily. Here is the little Verick before and after lacquering, all parts are now moving smoothly and it is ready to return home.
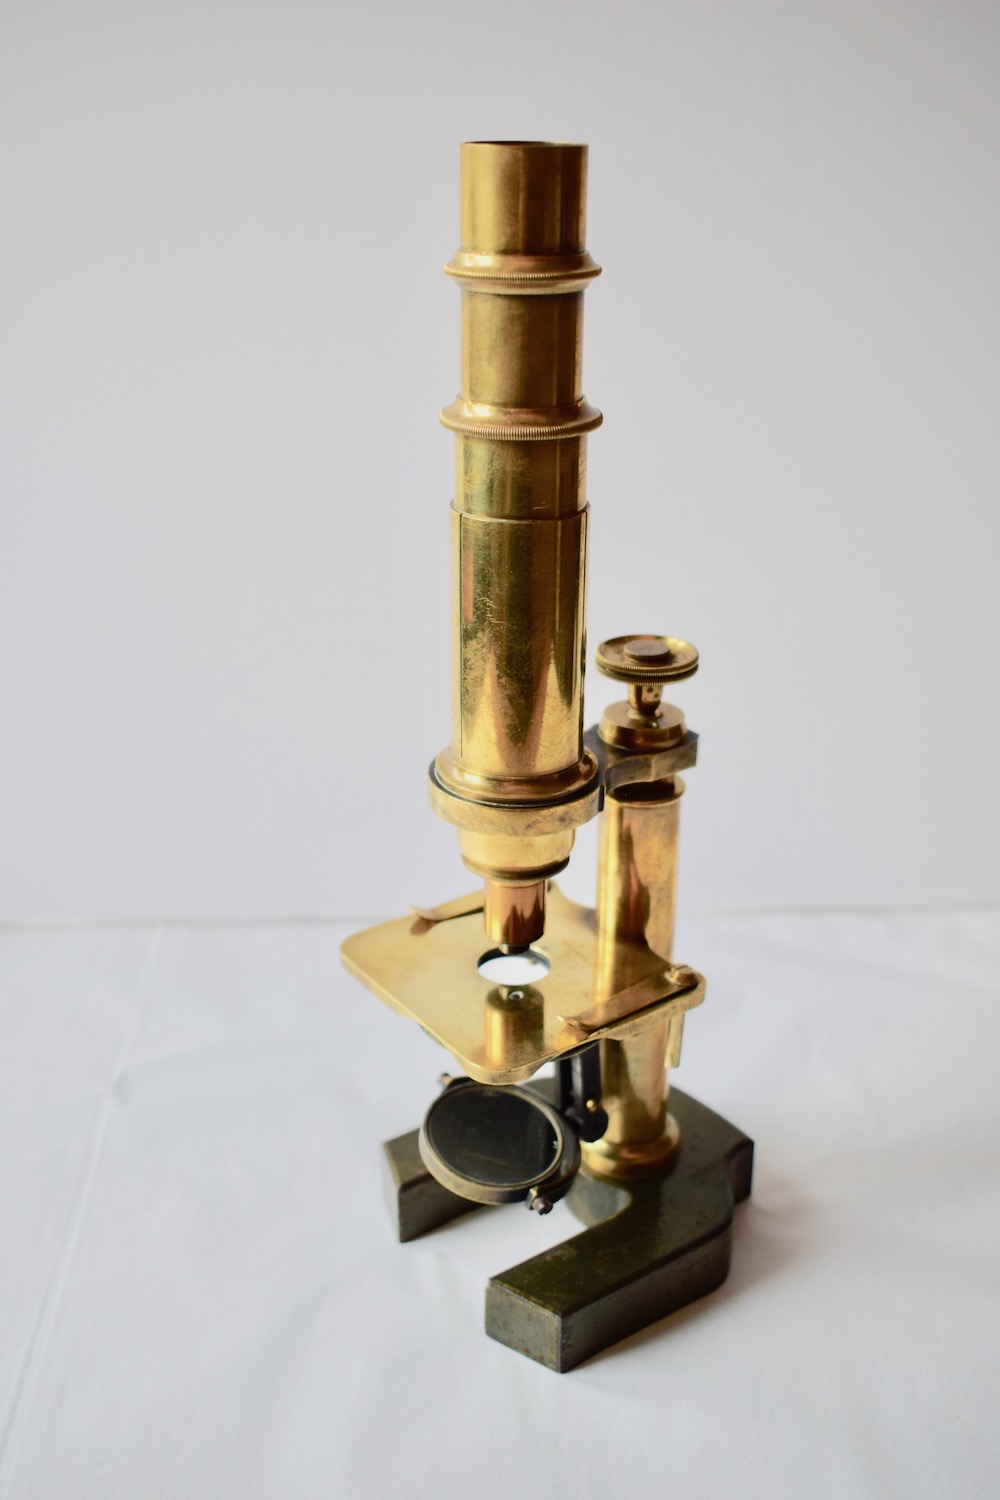
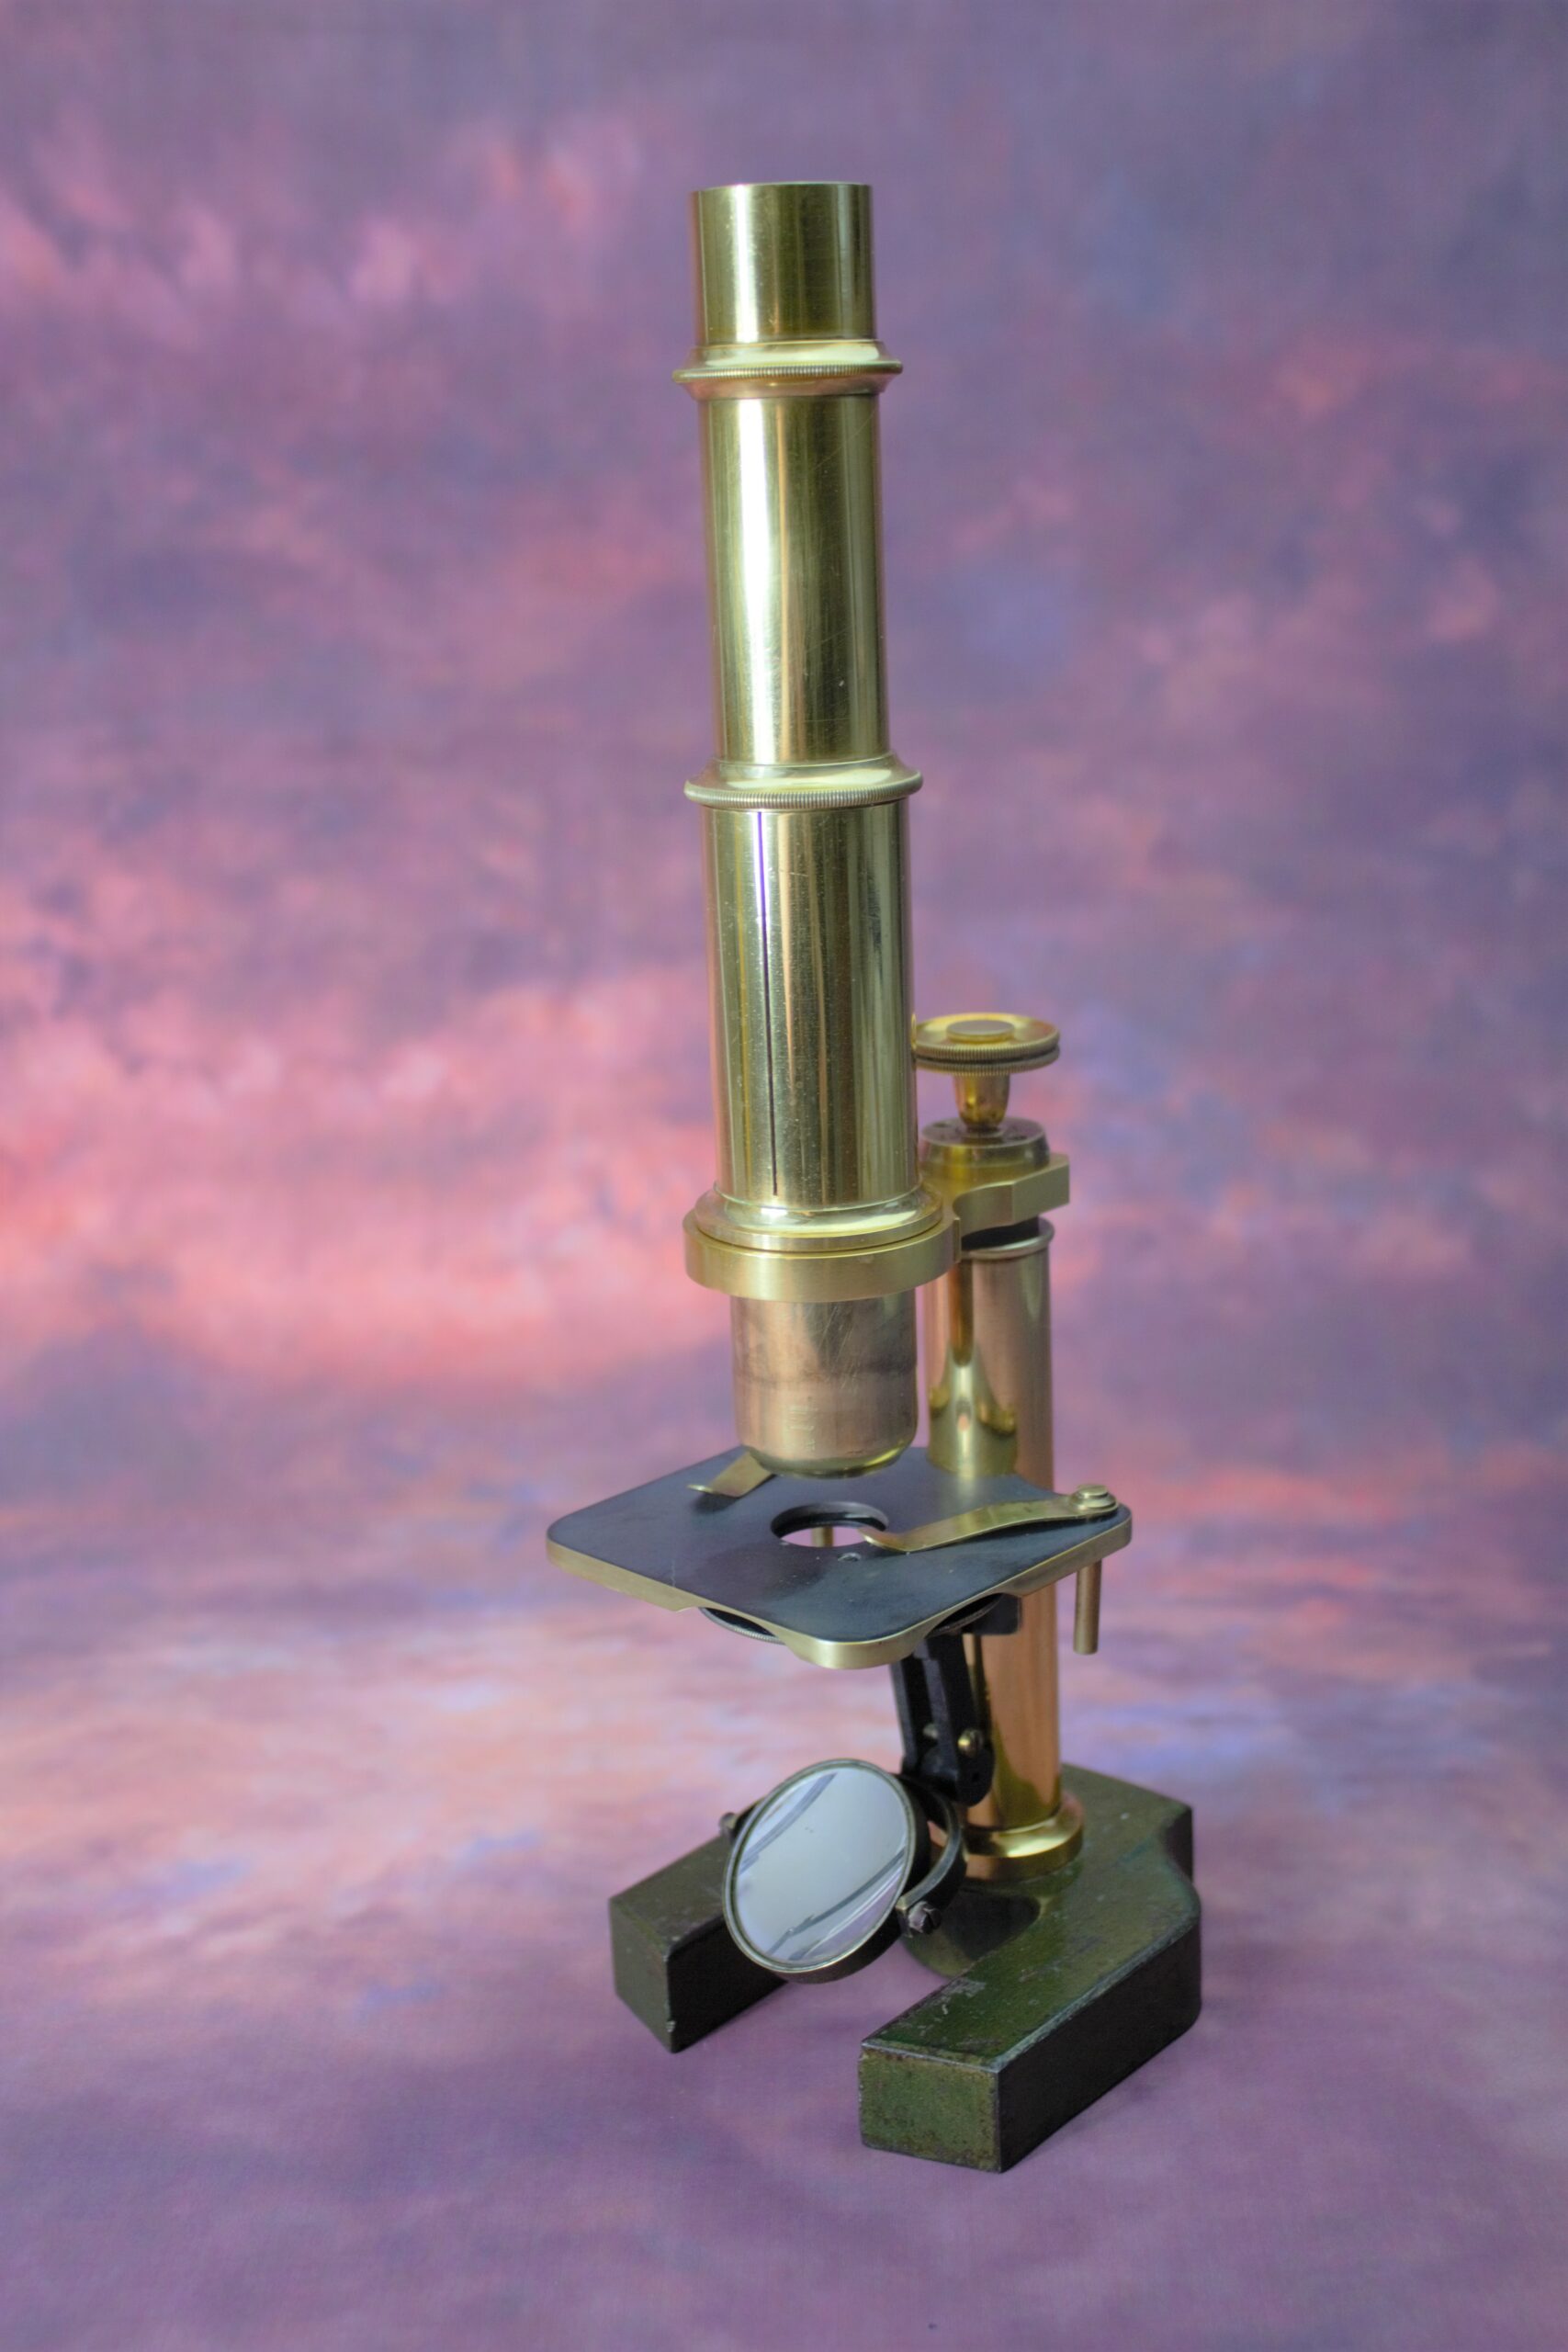
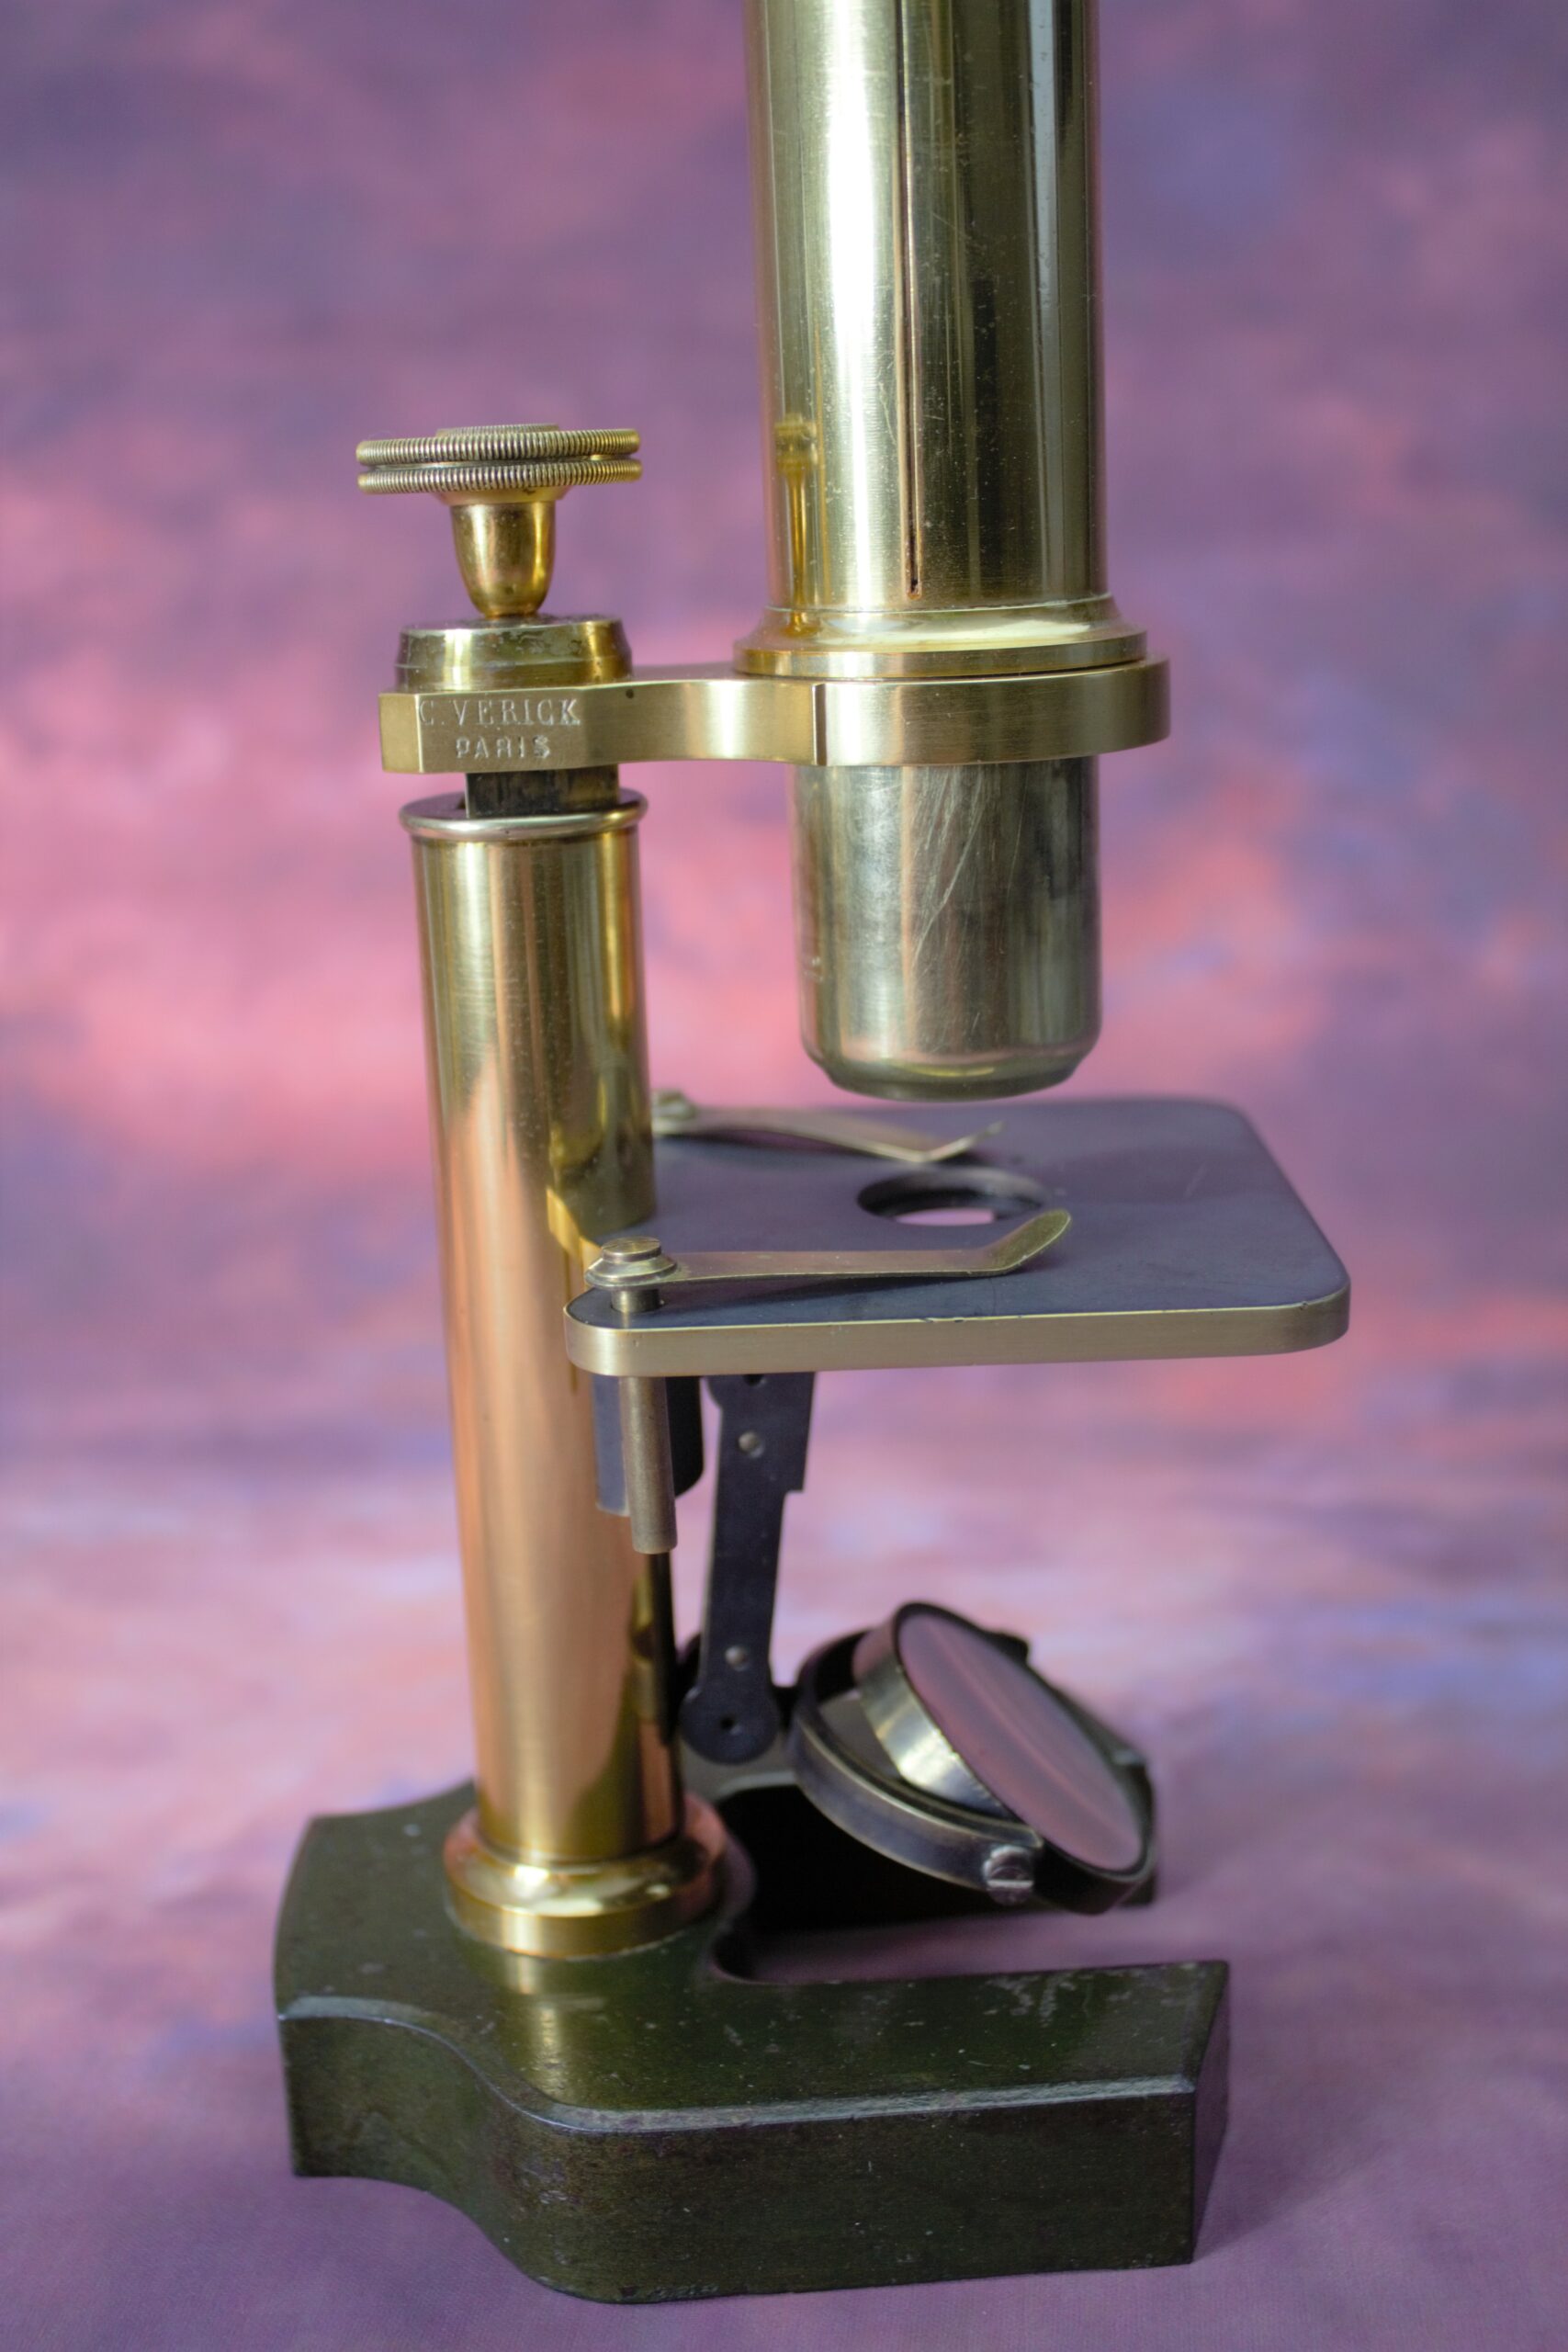
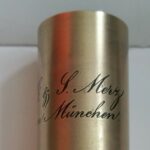
I have been restoring this lovely little Merz microscope, it’s a very special, rare microscope so I want to be careful not to over-restore it.
Below is a picture of it as it started out, as you can see it is fairly grubby. The stage has lost a great deal of its chemical blacking and there is verdigris on the foot where there is paint missing. There is no lacquer on the tube and the metal has become extremely dark. Of course, many people like the look of patinated brass, but to me, a completely blackened piece of brass is beyond a patina and certainly isn’t what the original maker would have wanted.
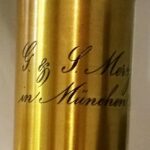
Merz
The first step in the restoration process is to clean the microscope inside and out. Corroded screws and small parts were placed in an extremely mild metal de-corroder. Larger parts were cleaned carefully by hand using decorroder or pre-lim as appropriate. Below you can see the tube in various stages of cleaning. Note that once the tube is cleaned you can actually see the guide lines the engraver used to keep his lettering a consistent size!
getting there
engraver’s guide lines visible
I have got to this point without using any harsh abrasives – no sandpaper, no polishing, nothing that removes any metal. Just de-corroder and pre-lim. Whilst there is still a very small amount of staining and a few small pits I did not remove them and went straight to a very, very, light straight-graining followed by lacquering.
The finished tube. You can still see the engraver’s guide lines and note that the un-lacquered parts of the microscope tube have been cleaned but have not been polished or otherwise altered.
engraver’s guide lines visible
Now for the paint, the paint is a mixture of dark umber and ochre pigments ground on a ground glass sheet with a muller. Linseed oil is added until a paste is formed, it takes a long time to get rid of all the lumps. The linseed and pigment paste is then thinned with tung oil and turpentine. Tung oil dries better than linseed alone and gives a higher gloss.
grinding with muller
I have not re-blackened the stage as I do not want to take away all signs of age and character. There are a couple of deep scratches on the stage though which look to be fairly recent and I shall probably blend them in a bit by blackening just the troughs of these scratches which are currently showing bright brass. I can do this by thickening the blackening chemical with PEG and painting it into the scratch marks with a very fine artist’s brush in much the same way engraver’s fill their work. That way it won’t affect the rest of the stage.
In the next post I shall show the reassembled microscope, right now the paint is drying.
Juglone, a brown dye, is found in several consumer products, including hair dye formulations and walnut oil stain. Juglone is an active ingredient in dietary supplements prepared from walnut hulls. Walnut hull extracts and poultices have been used for many years in folk remedies.
So here we have it , black walnut dye in alcohol. It came out quite pale so I had to evaporate off the alcohol and resuspended in a smaller volume. I started with 100mls and ended up with about 5mls but it’s the colour I wanted. Tomorrow I shall add a few drops to some lacquer and job done!
The walnut hulls in alcohol have been on the magnetic stirrer for about 6 hours with intermittent heat. I’m not terribly impressed with the depth of colour. It looks okay unfiltered on paper but I am not convinced it will be dark enough once it is filtered. We shall see. I’ll give it until the end of the day before I filter.
Sadly , my magnetic stirrer heating element is not thermostatically controlled so I can’t leave it on the heat unattended. I have to keep an eye on it. Makes for a rather boring day. I may concentrate it down after filtering. ideally it will be dark enough that I can just add a few drops to my usual lacquers to tone them down when necessary. I hope it’s worth it. I had high hopes.
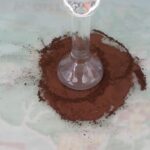
I’m still waiting for my walnut hulls to arrive (damn you bank holiday) but I thought I’d try mixing some alcohol dyed with coffee in with some lacquer while I wait. I am NOT going to use coffee in microscope lacquer but it does give me an indication of the kind of colour I might achieve when the walnut arrives. Coffee in the lacquer gives exactly the colour I want. Hurry up Post-lady! Bring me my walnut!
A small two tone Baker microscope appeared on eBay some years ago and I was quite taken with its beauty so when I happened across a very badly damaged Baker in need of re-lacquering I decided to recreate the two tone look.
This little chap has been something of an experimental piece as I have tested various brown and orange lacquers out on it. I am finally happy with it. I just have two small pieces drying and I can reassemble it properly. The slideshow below shows the microscope before and after restoration.
By varying the amounts of various ingredients, such as Dragon’s Blood, various lacquer colours can be achieved. Below is a picture showing three different batches of lacquer I have made applied to microscope parts.
I am about to make up a fresh batch of yellow as I have a piece to lacquer for a customer, I have some leftover yellow lacquer but I don’t want to risk using it. The lacquer ingredients are dissolved in pure ethanol, over time the ethanol takes up water and water is death to lacquer. Any water in your lacquer and you will get cloudiness and a nasty finish. It’s less trouble to make up fresh.
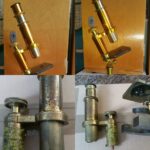
Not something you see every day -my lacquering washing line. It’s important not to touch the lacquer after it is applied. It needs to dry for several days before being cooked. This re-purposed Ikea wardrobe makes a fine drying cupboard. The wardrobe doors are a good cat deterrent too. Nothing worse than cat hair in the lacquer. I wonder how Victorian microscope makers kept their cats at bay?
I use stiff flexible lubricant hosing and crocodile clips to hold the work while I lacquer it. Once lacquering is complete I can bend the hose and hang it up in the wardrobe. Wire also works but the piece being lacquered can sometimes flop around too much, also wire is not unsuitable for tiny pieces like screws.
Today, I have been working with an unusual brown lacquer. Brown lacquers were not used a great deal, but it is good to have finally perfected one for those rare occasions when a brown lacquer is called for. The lacquer uses garnet shellac and is somewhat more tricky to apply than any of my yellow or gold lacquers. It is a fairly muted brown and needs to be applied in a slightly thicker layer than usual. Also, it is a damp, cold, dull day and lacquers are much easier to apply when there is bright light and low humidity.
It’s looking good, I am eager to see what it looks like once it has dried and has been cooked.
Brown lacquer applied to microscope limb
We use cookies on our website to give you the most relevant experience by remembering your preferences and repeat visits. By clicking “Accept All”, you consent to the use of ALL the cookies. However, you may visit "Cookie Settings" to provide a controlled consent.
This website uses cookies to improve your experience while you navigate through the website. Out of these, the cookies that are categorized as necessary are stored on your browser as they are essential for the working of basic functionalities of the website. We also use third-party cookies that help us analyze and understand how you use this website. These cookies will be stored in your browser only with your consent. You also have the option to opt-out of these cookies. But opting out of some of these cookies may affect your browsing experience.
Necessary cookies are absolutely essential for the website to function properly. These cookies ensure basic functionalities and security features of the website, anonymously.
Cookie
Duration
Description
cookielawinfo-checkbox-analytics
11 months
This cookie is set by GDPR Cookie Consent plugin. The cookie is used to store the user consent for the cookies in the category "Analytics".
cookielawinfo-checkbox-functional
11 months
The cookie is set by GDPR cookie consent to record the user consent for the cookies in the category "Functional".
cookielawinfo-checkbox-necessary
11 months
This cookie is set by GDPR Cookie Consent plugin. The cookies is used to store the user consent for the cookies in the category "Necessary".
cookielawinfo-checkbox-others
11 months
This cookie is set by GDPR Cookie Consent plugin. The cookie is used to store the user consent for the cookies in the category "Other.
cookielawinfo-checkbox-performance
11 months
This cookie is set by GDPR Cookie Consent plugin. The cookie is used to store the user consent for the cookies in the category "Performance".
viewed_cookie_policy
11 months
The cookie is set by the GDPR Cookie Consent plugin and is used to store whether or not user has consented to the use of cookies. It does not store any personal data.
Functional cookies help to perform certain functionalities like sharing the content of the website on social media platforms, collect feedbacks, and other third-party features.
Performance cookies are used to understand and analyze the key performance indexes of the website which helps in delivering a better user experience for the visitors.
Analytical cookies are used to understand how visitors interact with the website. These cookies help provide information on metrics the number of visitors, bounce rate, traffic source, etc.
Advertisement cookies are used to provide visitors with relevant ads and marketing campaigns. These cookies track visitors across websites and collect information to provide customized ads.