

I have been restoring this lovely little Merz microscope, it’s a very special, rare microscope so I want to be careful not to over-restore it.
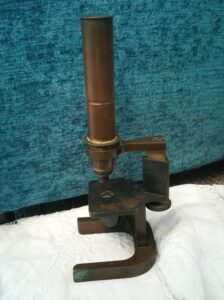
Below is a picture of it as it started out, as you can see it is fairly grubby. The stage has lost a great deal of its chemical blacking and there is verdigris on the foot where there is paint missing. There is no lacquer on the tube and the metal has become extremely dark. Of course, many people like the look of patinated brass, but to me, a completely blackened piece of brass is beyond a patina and certainly isn’t what the original maker would have wanted.
The first step in the restoration process is to clean the microscope inside and out. Corroded screws and small parts were placed in an extremely mild metal de-corroder. Larger parts were cleaned carefully by hand using decorroder or pre-lim as appropriate. Below you can see the tube in various stages of cleaning. Note that once the tube is cleaned you can actually see the guide lines the engraver used to keep his lettering a consistent size!
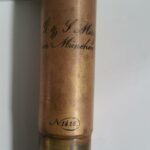
I have got to this point without using any harsh abrasives – no sandpaper, no polishing, nothing that removes any metal. Just de-corroder and pre-lim. Whilst there is still a very small amount of staining and a few small pits I did not remove them and went straight to a very, very, light straight-graining followed by lacquering.
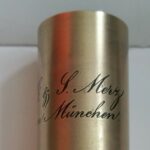
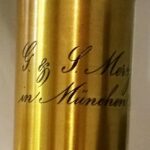
The finished tube. You can still see the engraver’s guide lines and note that the un-lacquered parts of the microscope tube have been cleaned but have not been polished or otherwise altered.
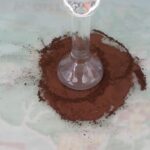
Now for the paint, the paint is a mixture of dark umber and ochre pigments ground on a ground glass sheet with a muller. Linseed oil is added until a paste is formed, it takes a long time to get rid of all the lumps. The linseed and pigment paste is then thinned with tung oil and turpentine. Tung oil dries better than linseed alone and gives a higher gloss.
I have not re-blackened the stage as I do not want to take away all signs of age and character. There are a couple of deep scratches on the stage though which look to be fairly recent and I shall probably blend them in a bit by blackening just the troughs of these scratches which are currently showing bright brass. I can do this by thickening the blackening chemical with PEG and painting it into the scratch marks with a very fine artist’s brush in much the same way engraver’s fill their work. That way it won’t affect the rest of the stage.
In the next post I shall show the reassembled microscope, right now the paint is drying.