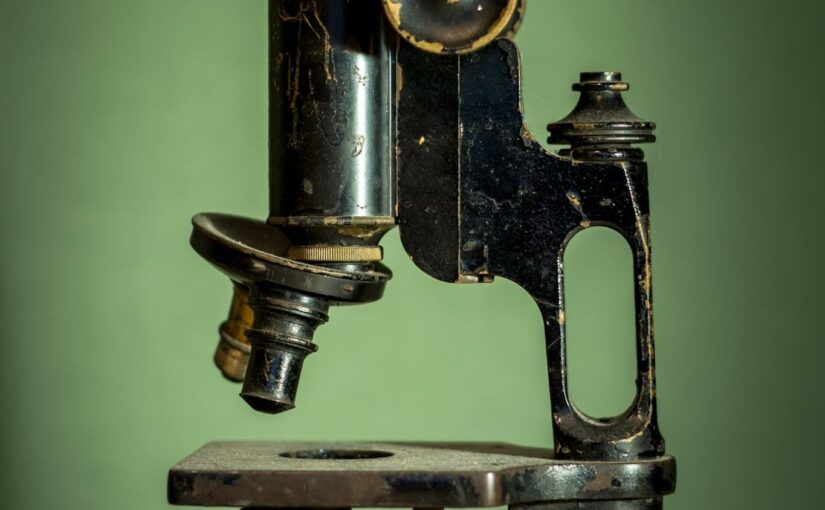
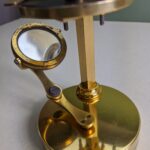
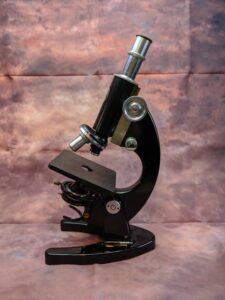
Work on the Spencer jug handled microscope continues. The final coat of paint is on and once that is polished up I can get on with the bit I like – lacquering.
Work on the Spencer jug handled microscope continues. The final coat of paint is on and once that is polished up I can get on with the bit I like – lacquering.
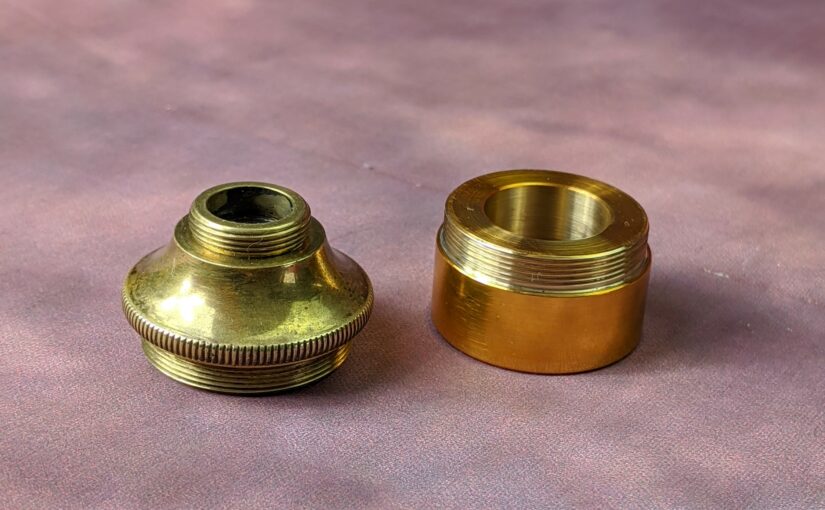
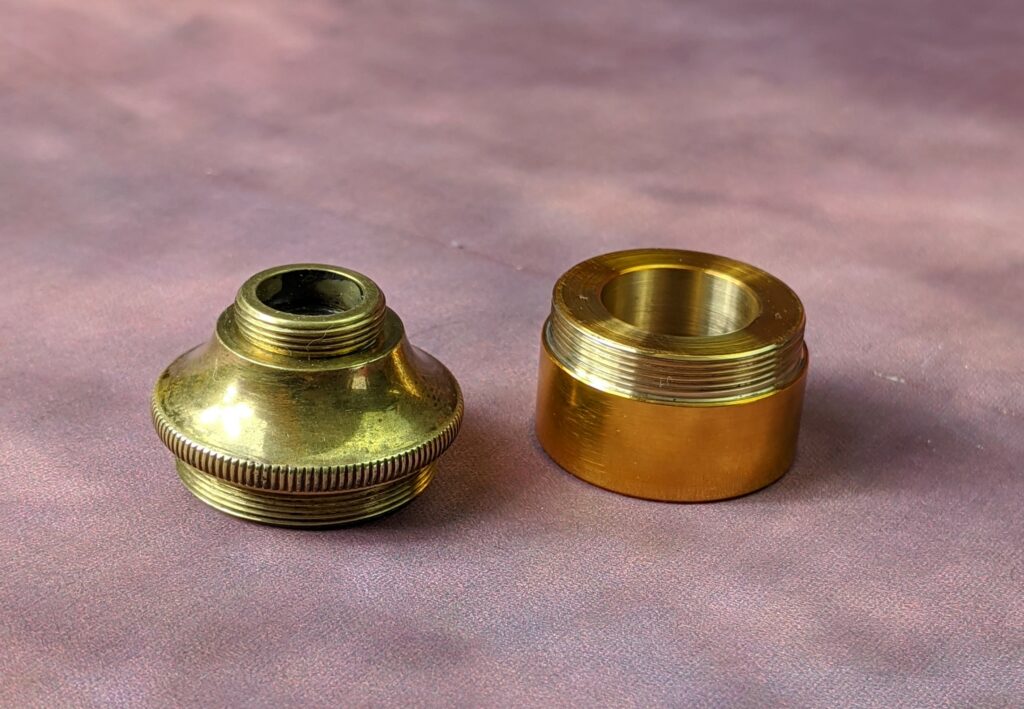
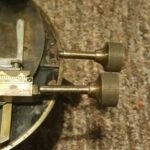
I was asked to make a new nosepiece for a Hartnack microscope which would enable the owner to use RMS objectives as he finds Hartnack objectives very fiddly. The Hartnack has a small diameter male Thury thread whereas the RMS is a larger female Whitworth thread. The nosepiece maintains the tube length but the Harnack has an adjustable tube length anyway and the new nose piece works just fine. As you can see there is quite a difference in the width where the objective attaches. The new RMS nosepiece looks a little clumsy compared to the original.
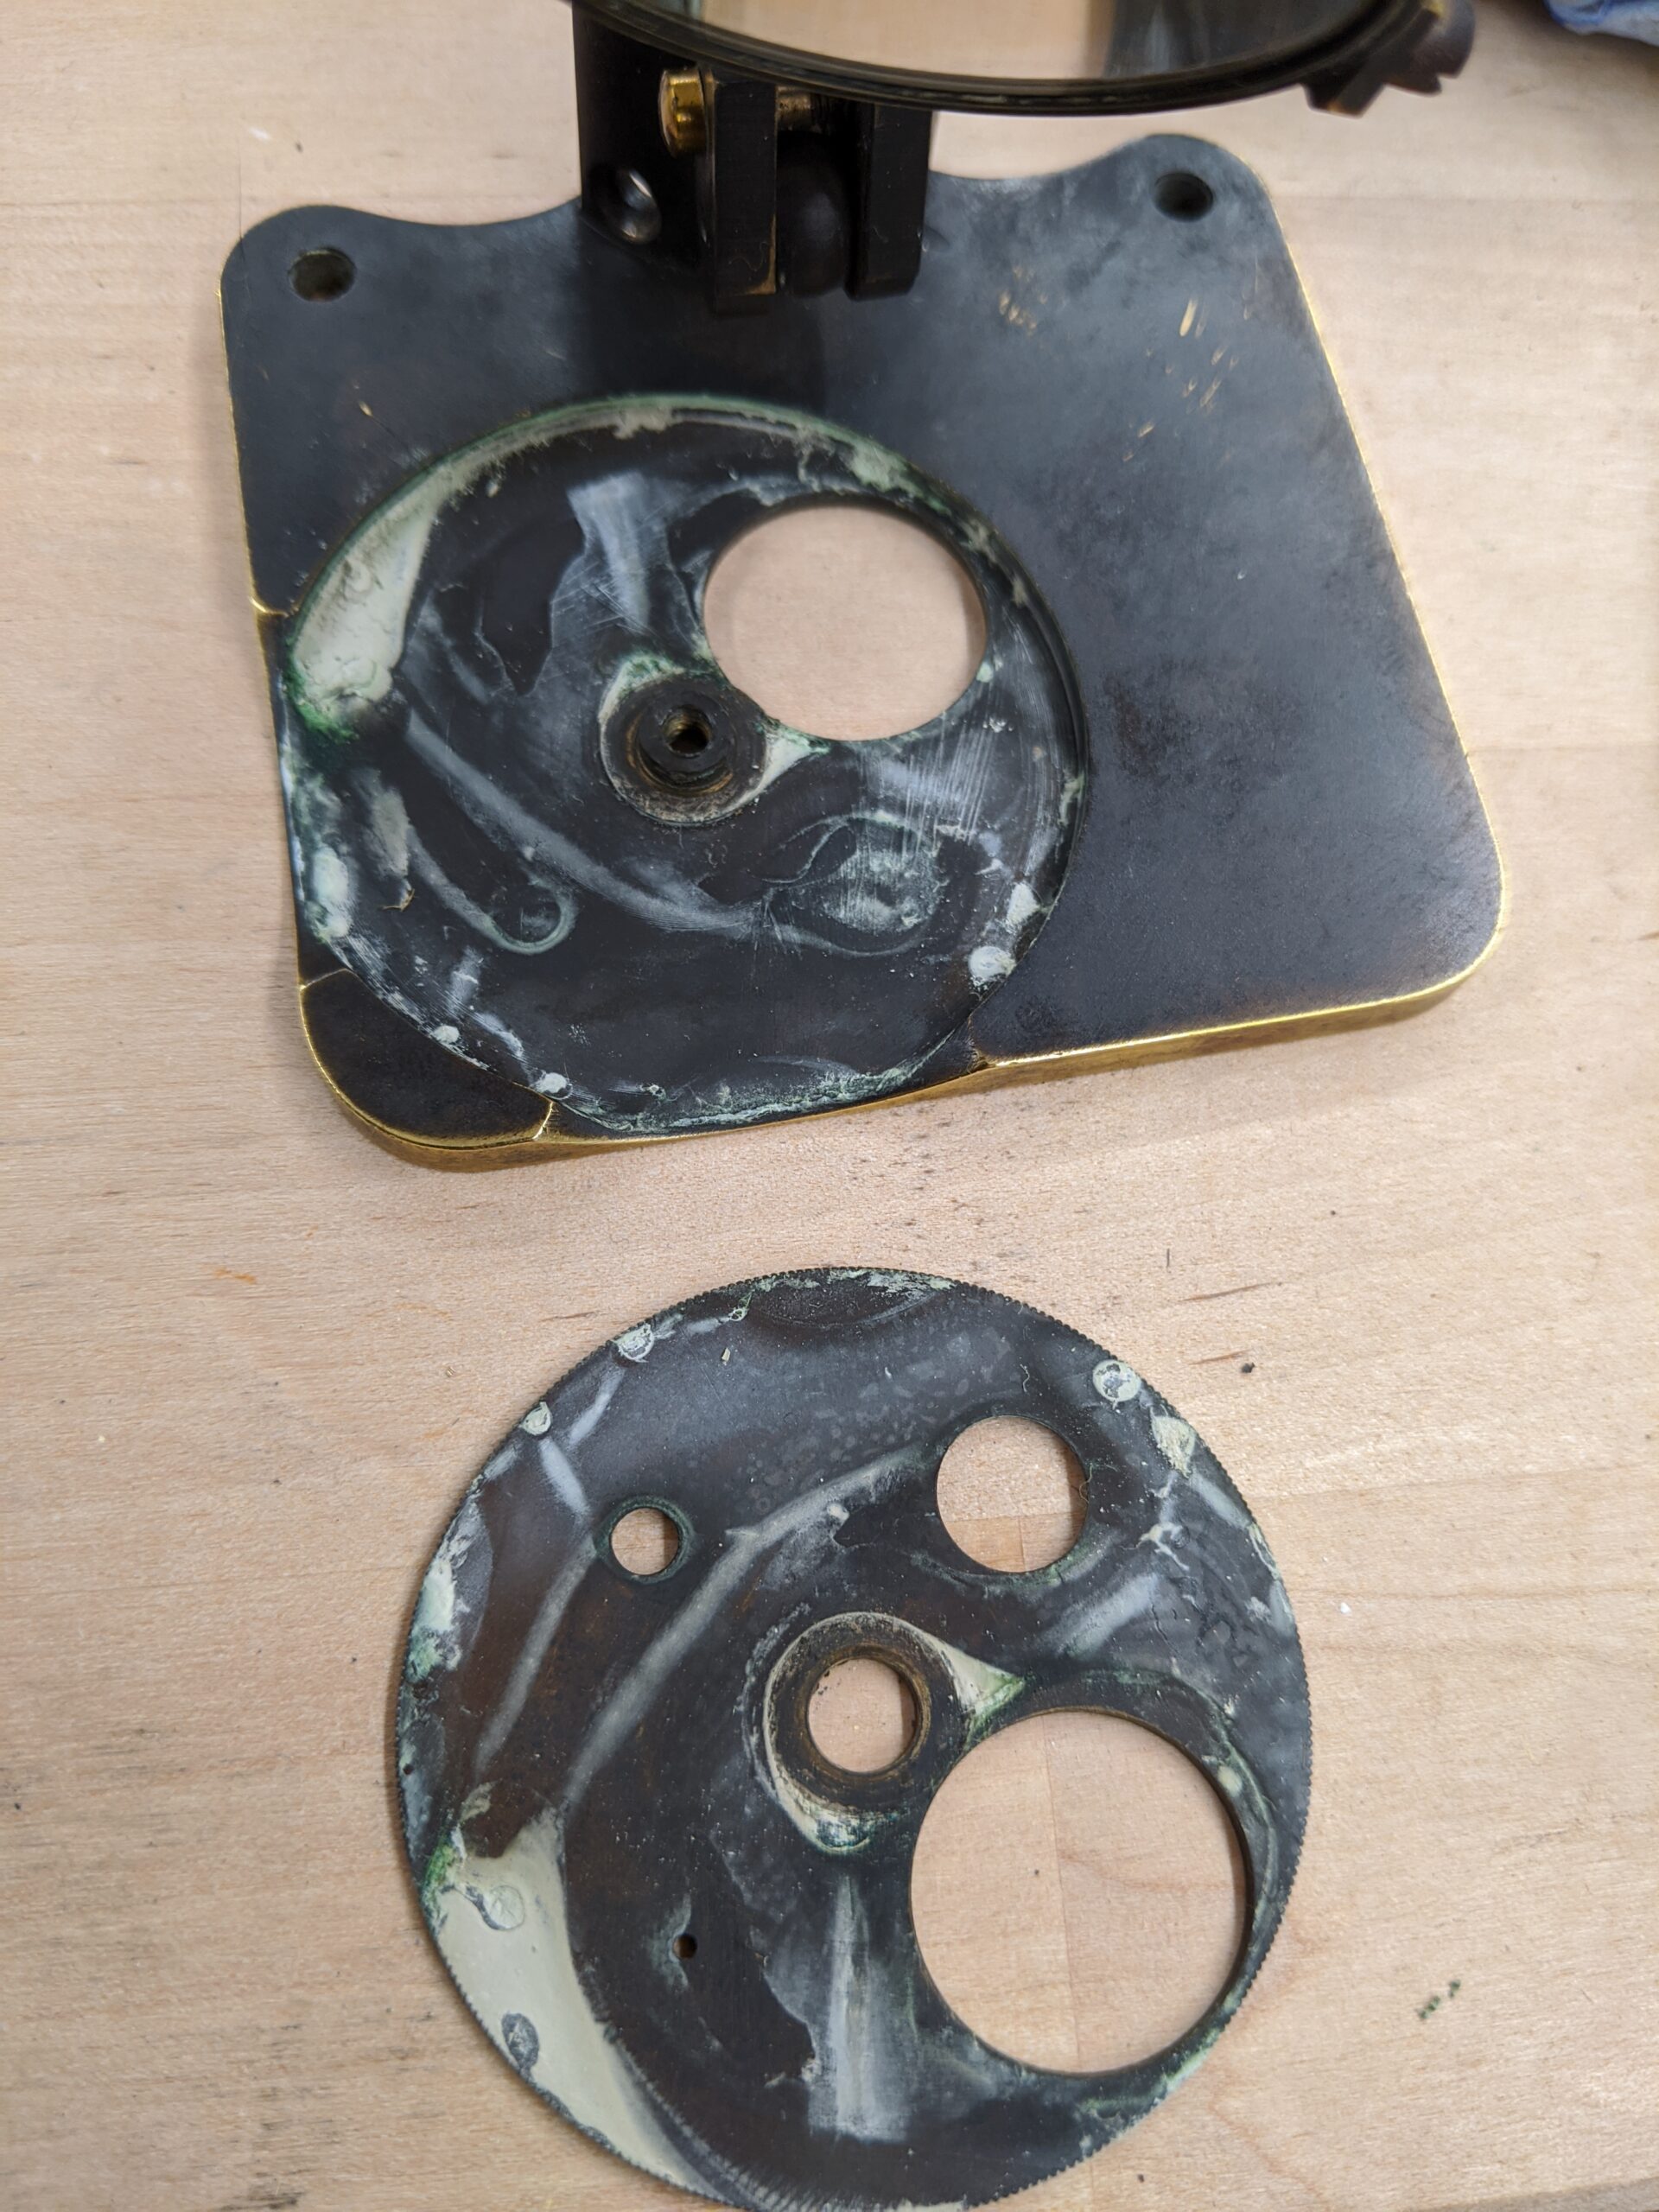
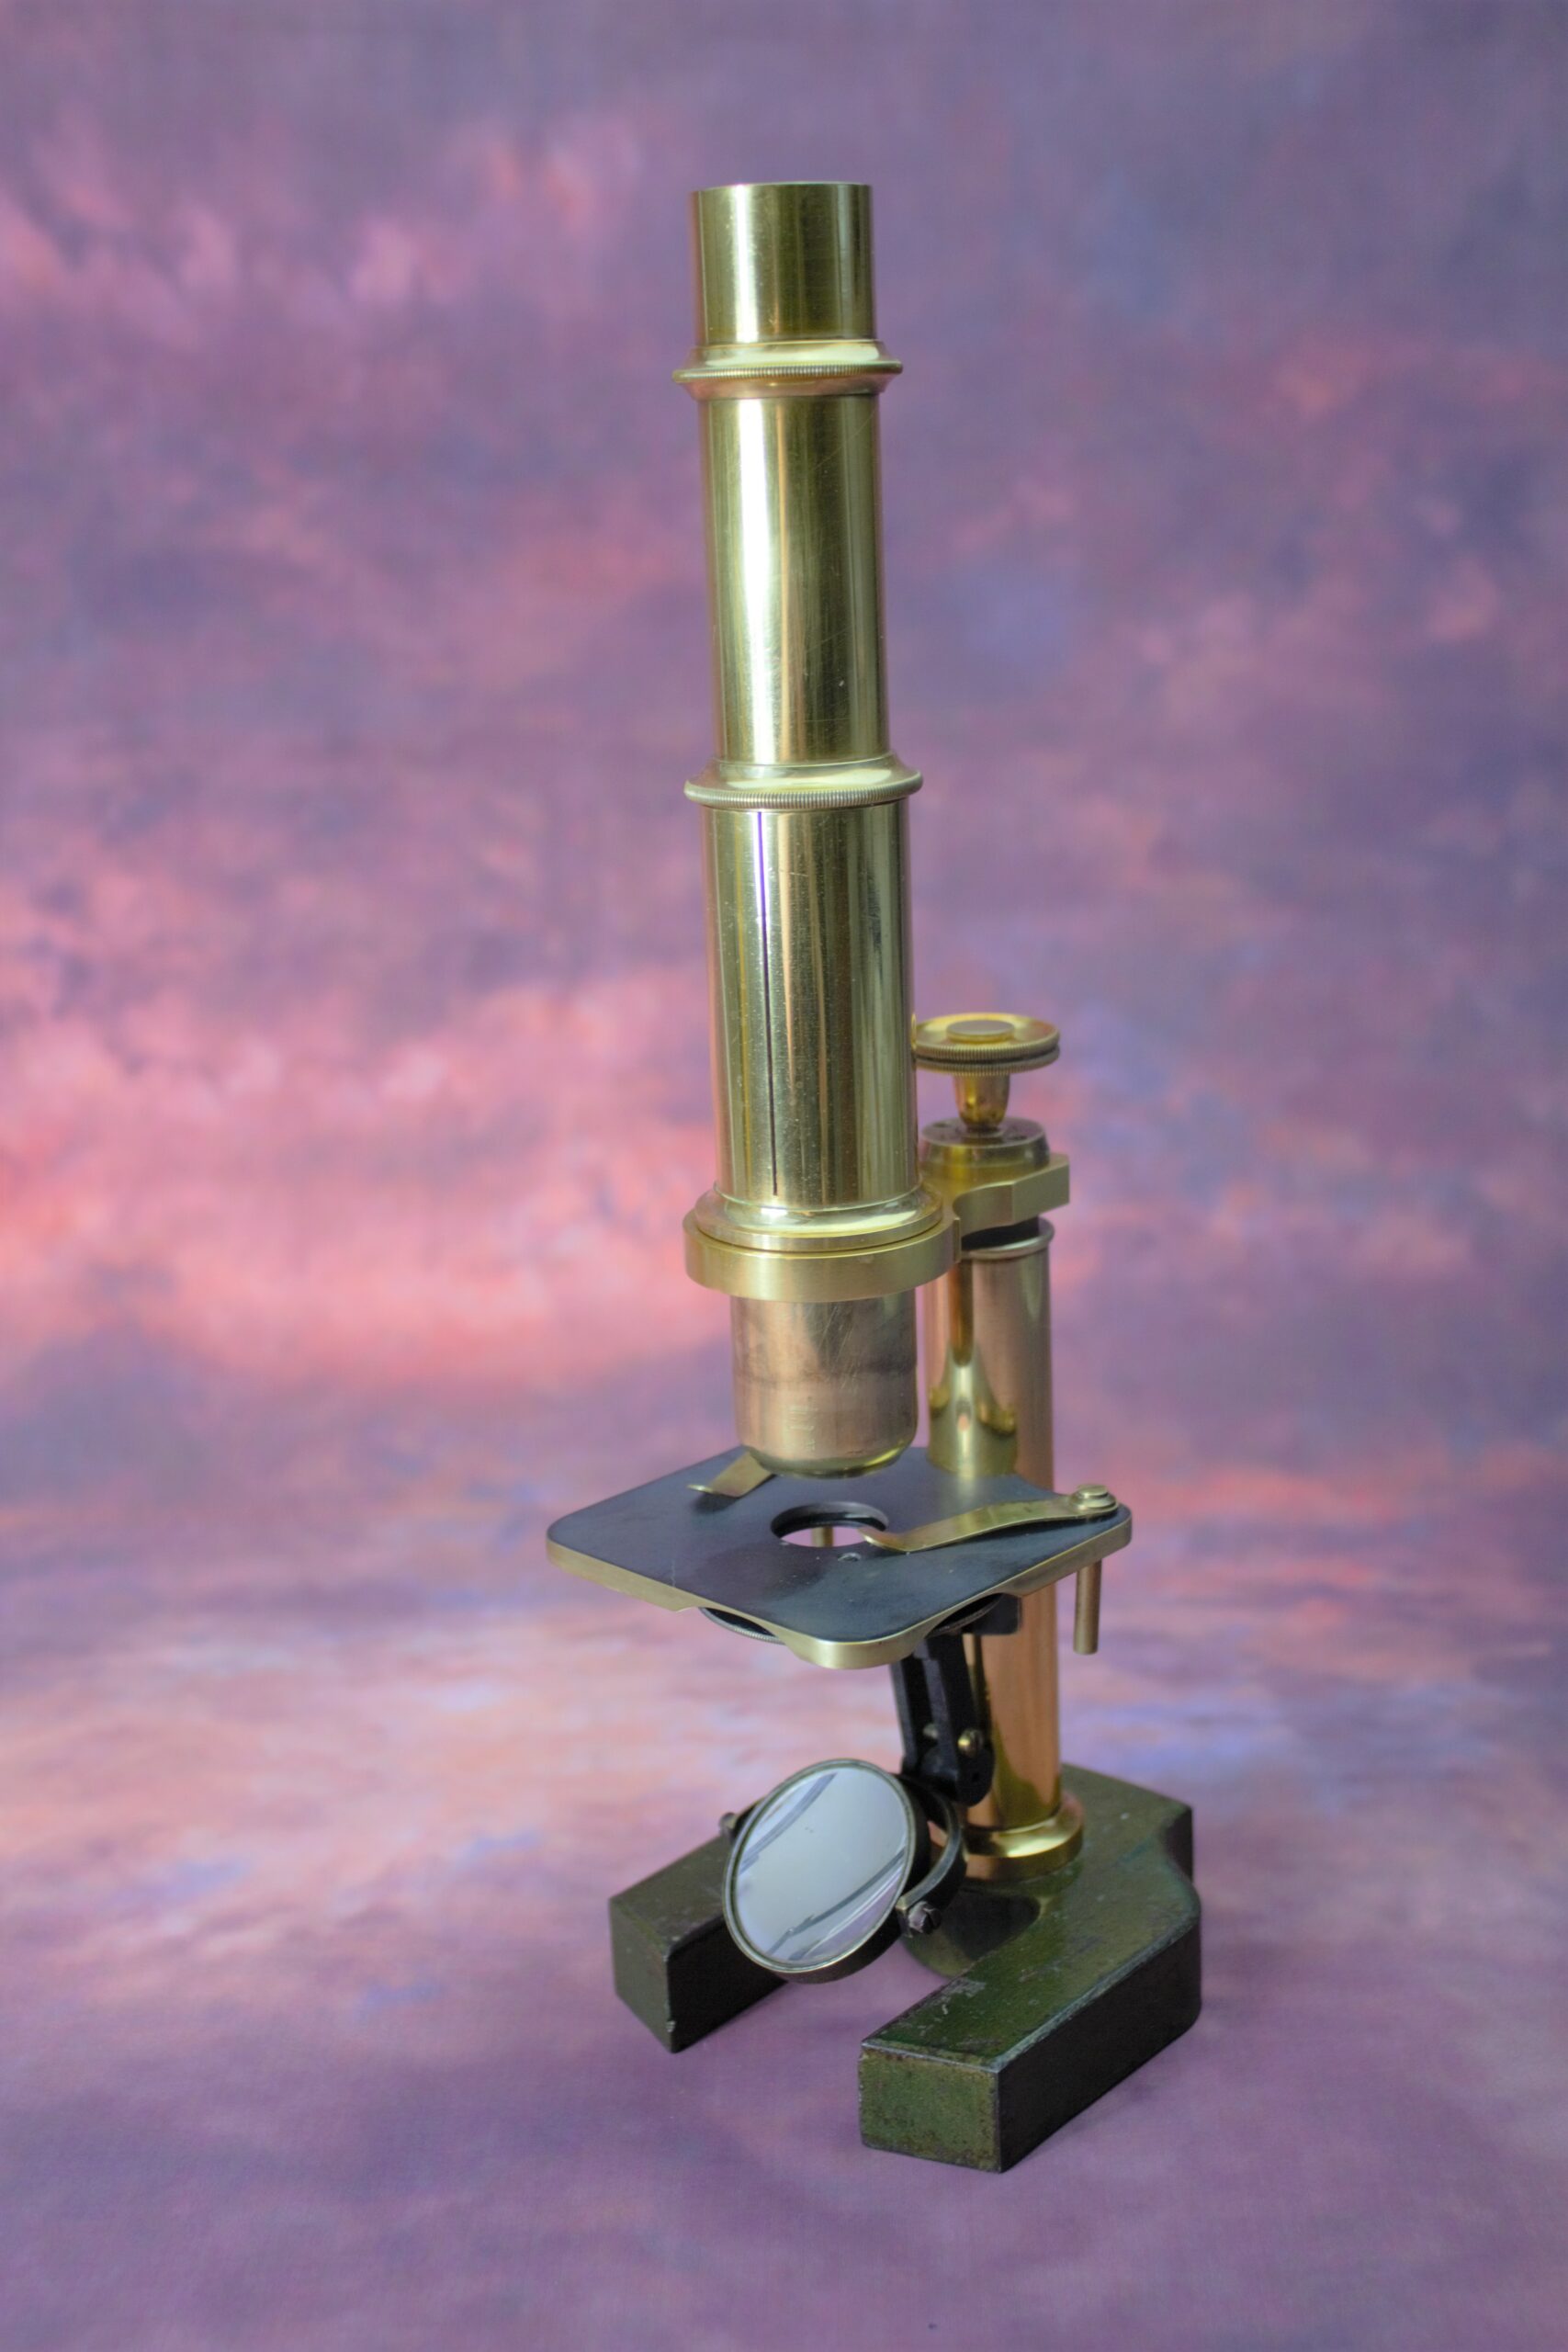
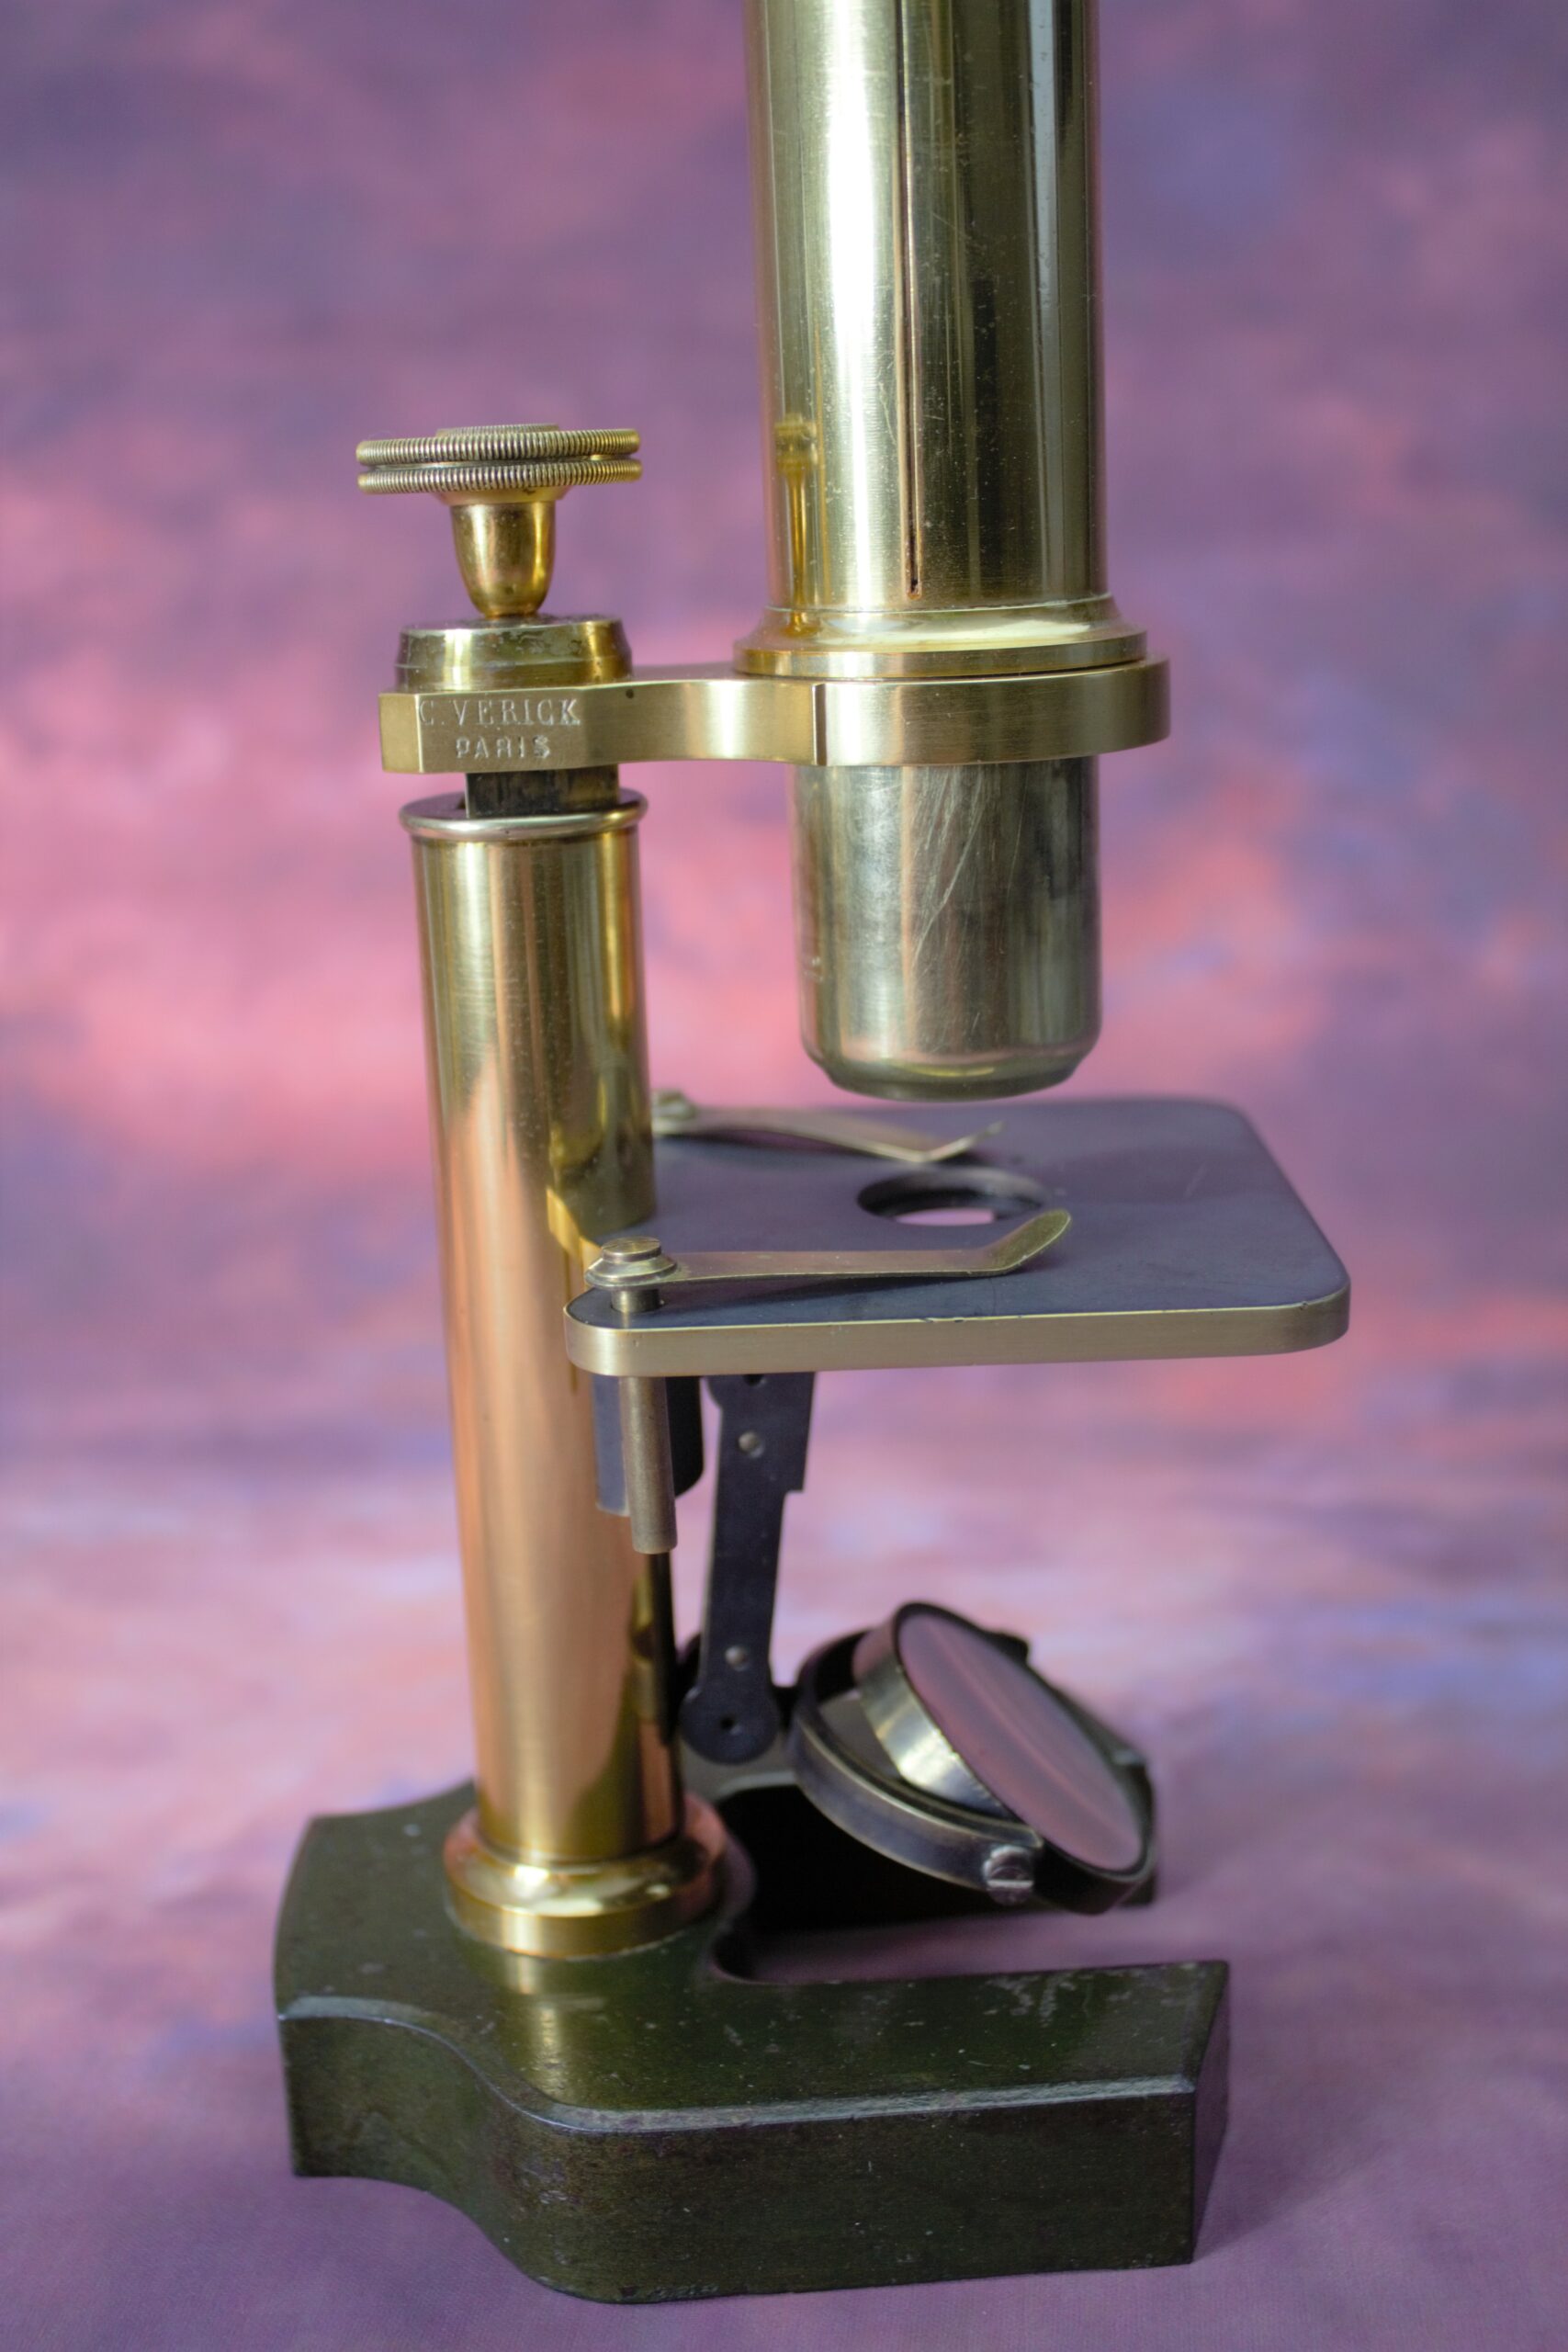
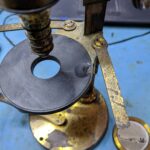
Oh the poor little Verick! In a photograph there didn’t seem much wrong with this Verick apart from the total lack of lacquer but it had serious issues. The Tube holder was stuck fast, the tube was stuck fast in the tube holder and it took several hours to get it all unstuck. The cause? Brasso. Don’t use brasso on your microscopes, it removes the lacquer and clogs up the moving parts it’s like glue. Below is a picture of the aperture ring which was also stuck fast and what it looked like inside when I finally got it apart.
There is hope though, if you can get the microscope apart the brasso can be removed quite easily. Here is the little Verick before and after lacquering, all parts are now moving smoothly and it is ready to return home.
This beautiful little Plossl had been mistreated, either stored in an attic or garage, or otherwise abused. Very little lacquer remained and that which did was decaying casuing corrosion and pitting to the metal. I have stripped off the old lacquer, removed the corrosion and polished without removing all the scratches and pitting that show the age and history of the microscope. They are simply safely locked away under new lacquer which should protect it from any further degradation. I have not lacquered the mirror or the objective as the risk of damage to them by polishing and hot lacquering was quite great. I’m rather pleased with it.


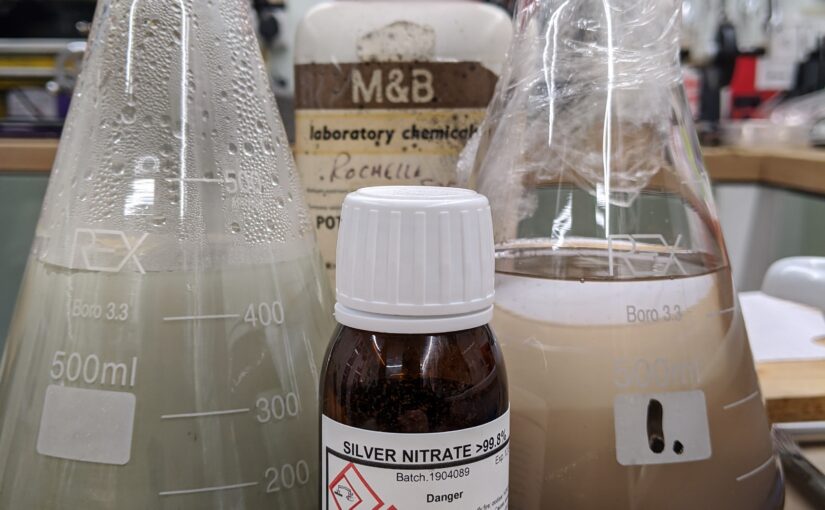
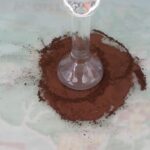
Today I’m preparing to silver a mirror. I use the Rochelle salt method as follows:
Solution 1: Silver nitrate 2.48 grams, silver nitrate 2.07 grams, distilled water 473mls, 25% ammonia as required.
Dissolve 2.48 grams of silver nitrate in 120mls water stirring with a glass rod. Add around 30 drops of ammonia, the solution will go dark and will then gradually clear again. Once the solution is clear add the rest of the silver and swirl until dissolved. Add the remaining water. Leave to settle for an hour or two then filter and store in a dark bottle labelled Solution 1.
Solution 2: Rochelle salts (potassium sodium tartrate) 1.56 grams, silver nitrate 1.62 grams, distilled water 473mls.
Add 1.56g rochelle salts to water in a glass vessel and bring to the boil. After boiling for 1 minute add the silver nitrate and boil for a further 5 minutes. Leave to cool then filter and store in a dark glass bottle labelled Solution 2.
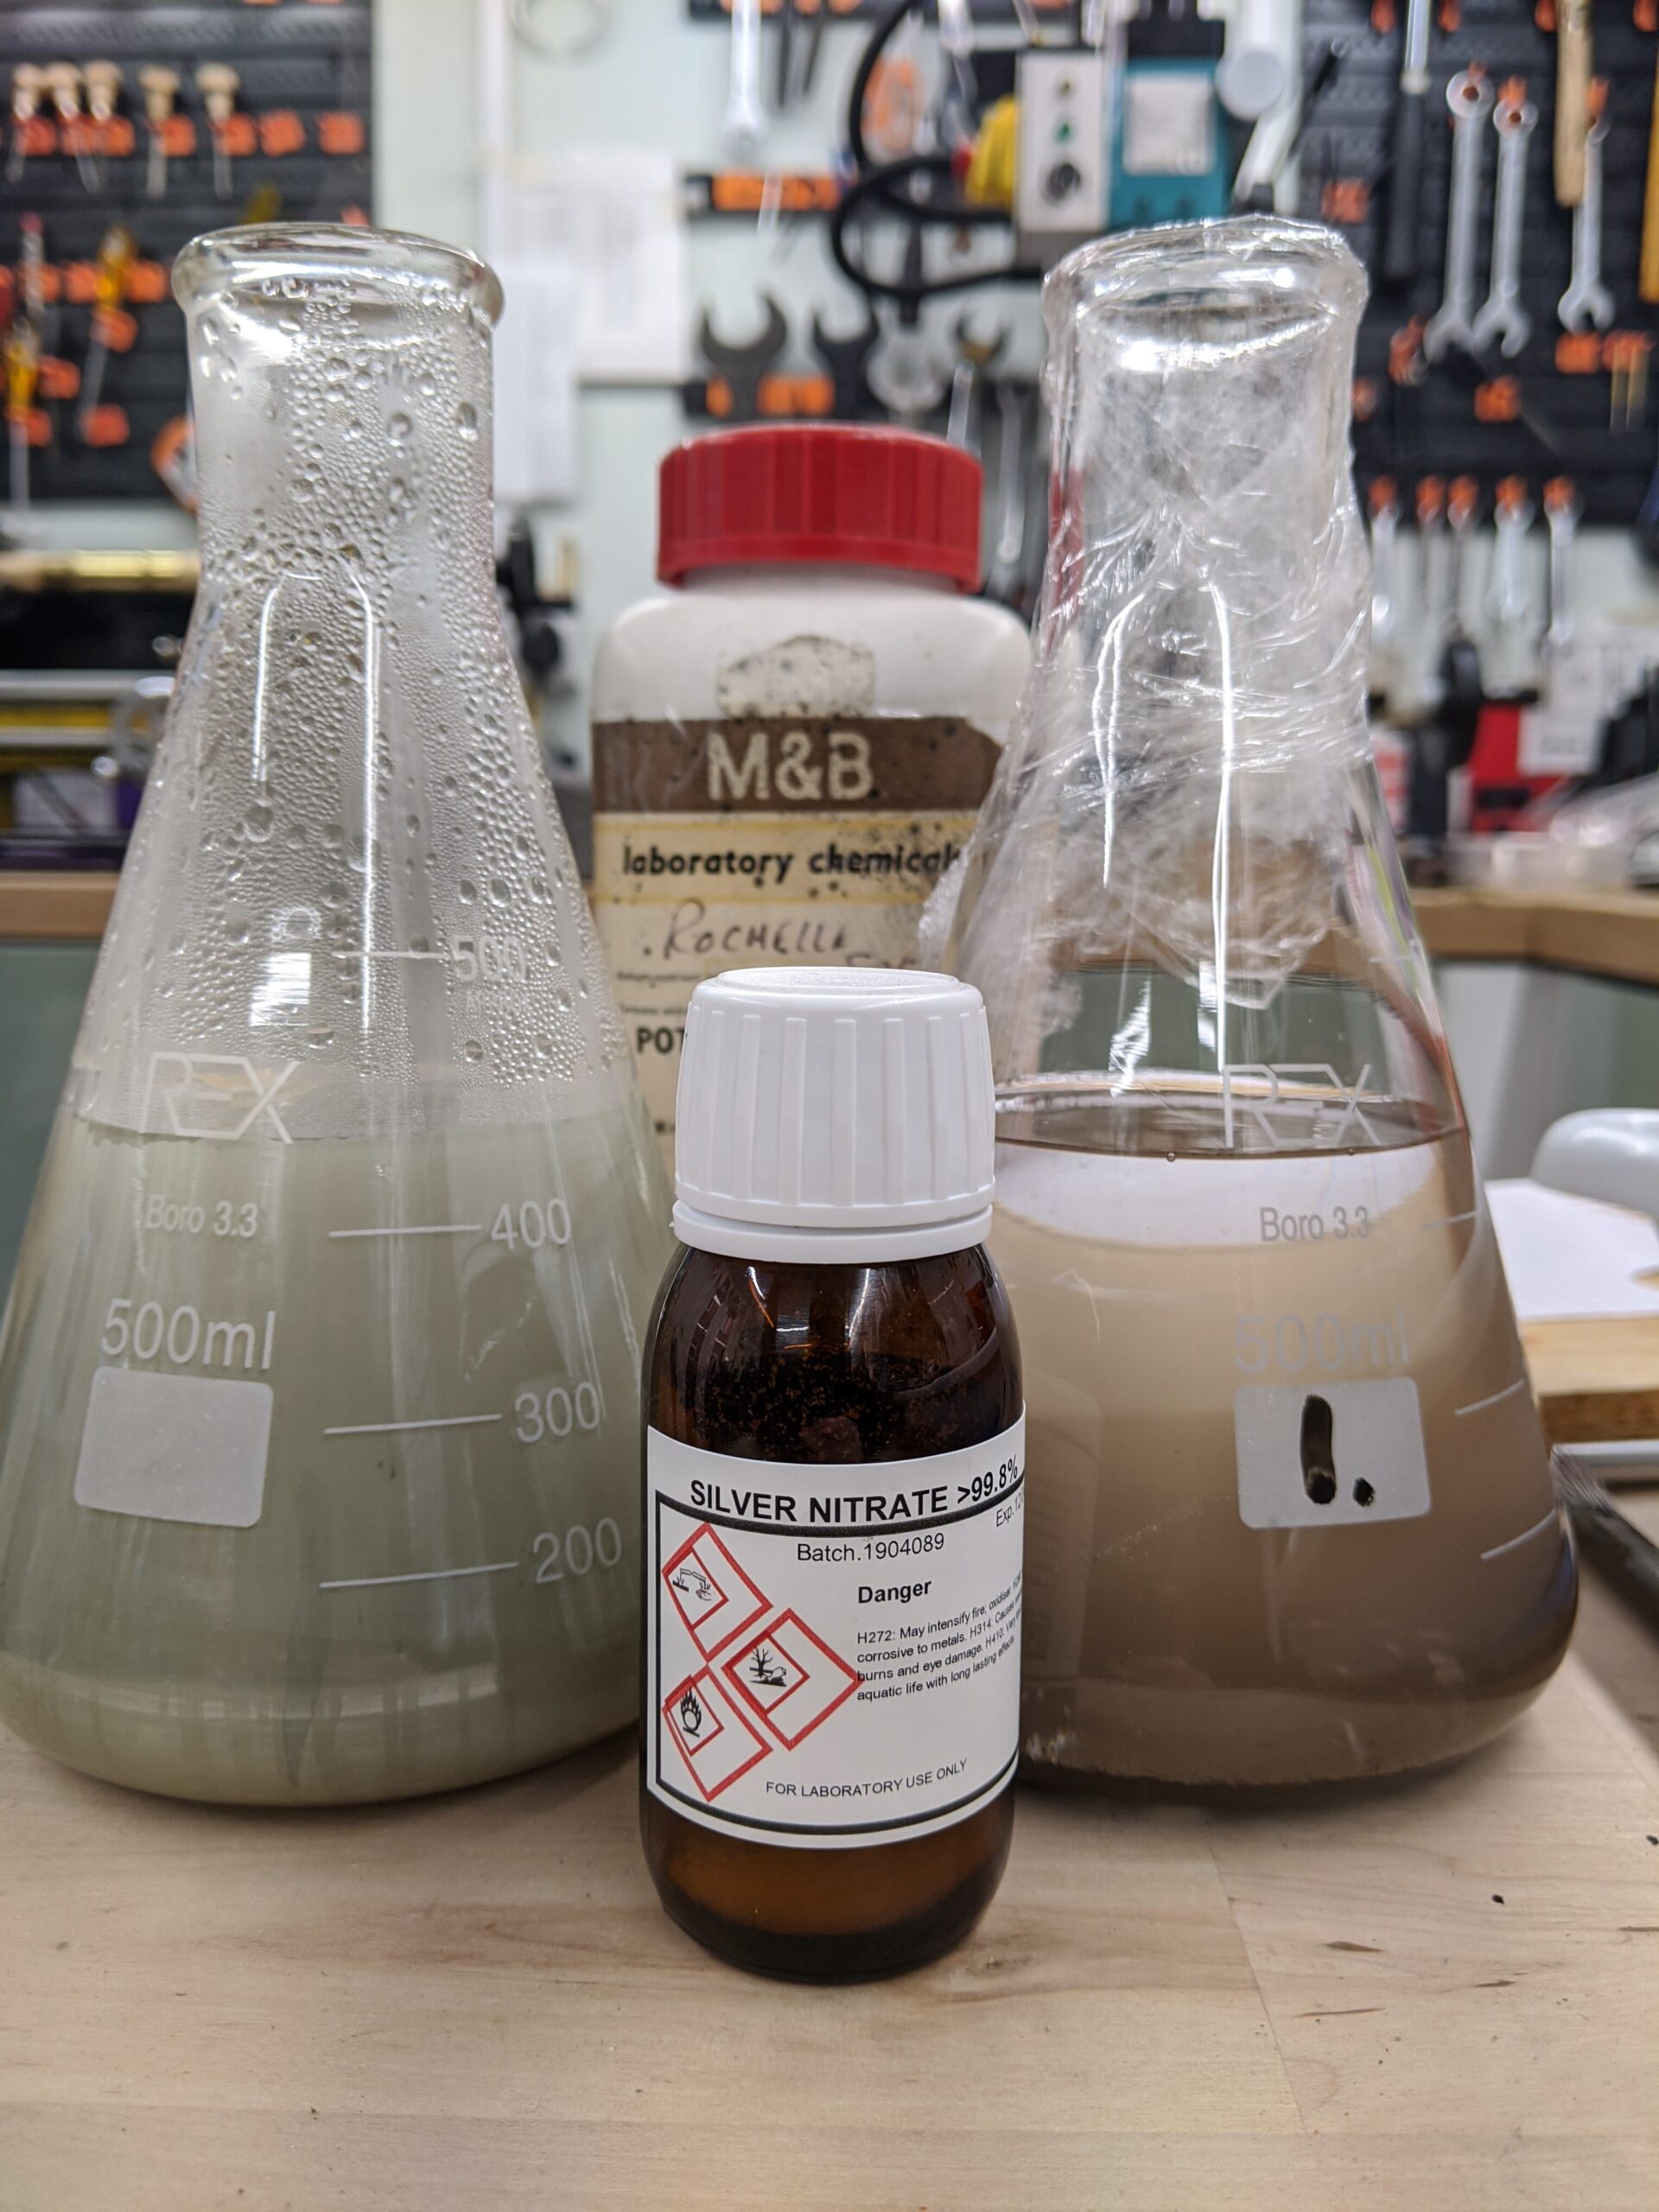
Thoroughly clean and de-grease the glass to be silvered and tape up any areas on which silvering is not required. Warm the glass to about 38C with warm distilled water, when warm, drain off the water and cover with a 1:1 mixture of solutions 1 and 2. It is best to warm the solutions before mixing them together. Swirl the mixture over the glass for around half an hour then pour off the solution, rinse in distilled water and leave to dry. Gently paint the back of the mirror with a suitable paint to protect it from abrasion.
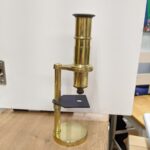
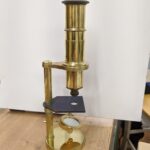
This miniature microscope has been cleaned and is awaiting lacquer. It was missing something important so a new piece had to be made. Now it is in full working order.
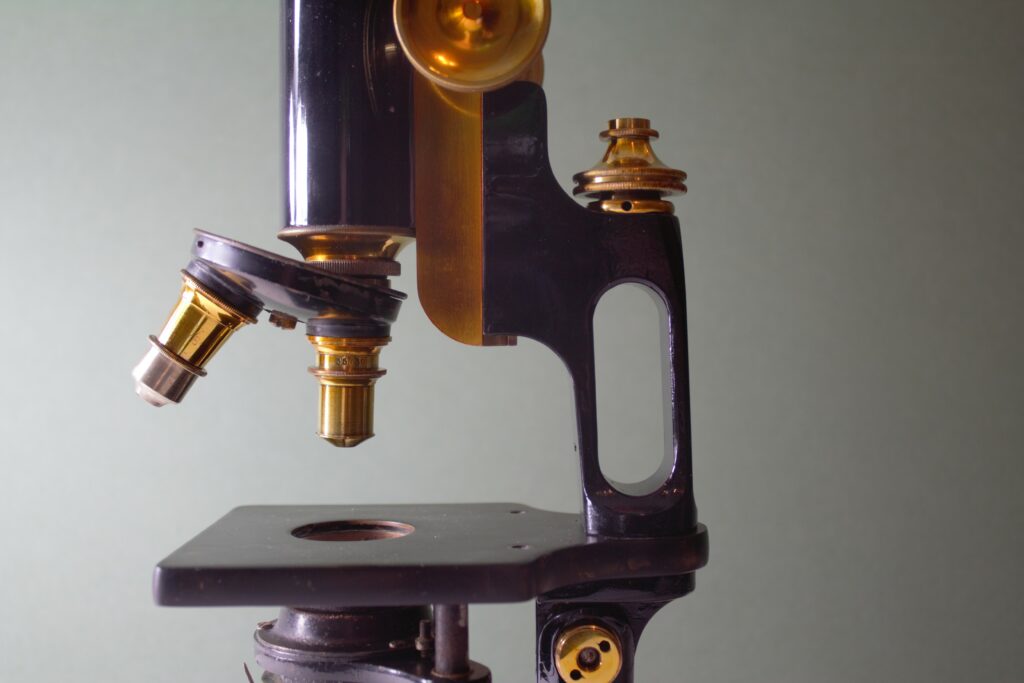
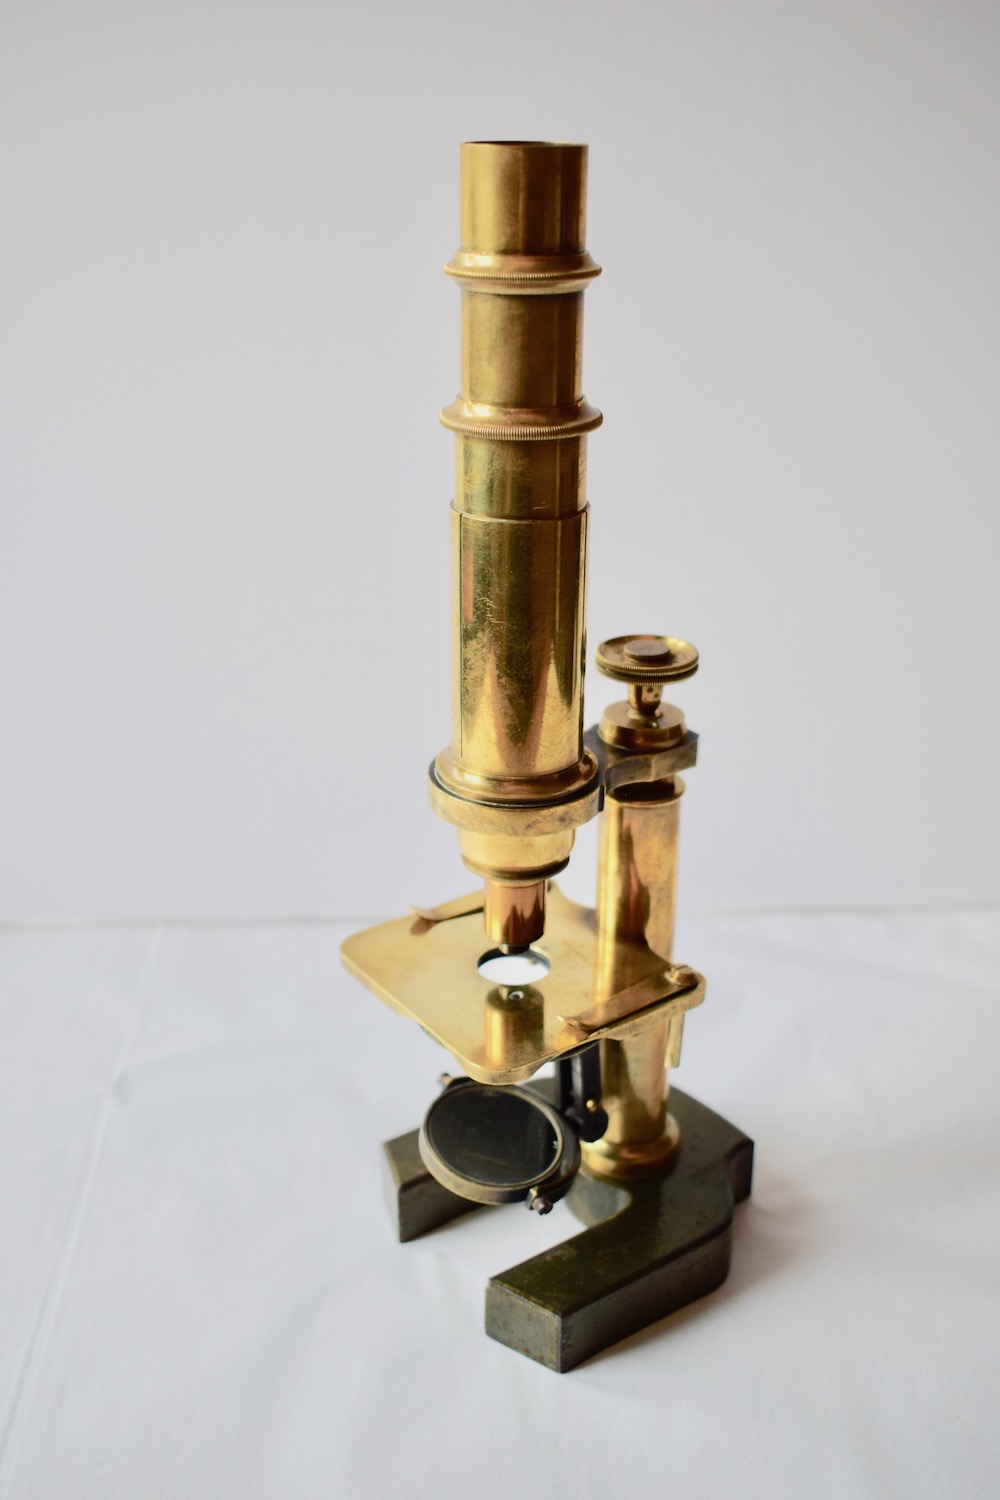
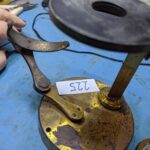
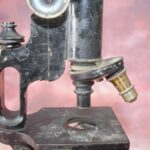
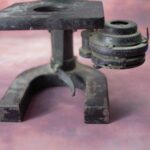
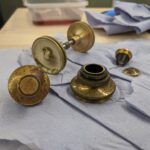
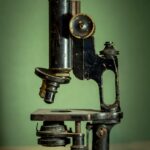
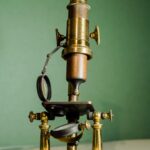
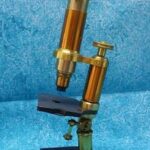
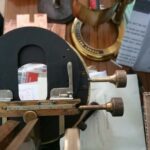
I bought this Spencer jug-handled microscope some time ago, at first glance it doesn’t look too terrible, a broken mirror holder and a missing mirror; but if you look again you will see that the poor thing has been spray painted black from top to bottom. The objectives, the coarse and fine focus knobs – everything is painted. This is a serious rescue, I have never had to use paint stripper on a microscope before but this calls for desperate measures. As you can see in the last picture, so far not too terrible, there is hope. I have stripped the black paint off the focus knobs, and underneath the paint the coarse focus has polished up pretty well. I have to de-corrode the other parts and see if I can get a polish on them good enough for hot lacquering. It’s not so much a restoration as a salvage operation, but I have a soft spot for jug handled microscopes. Wish me luck!
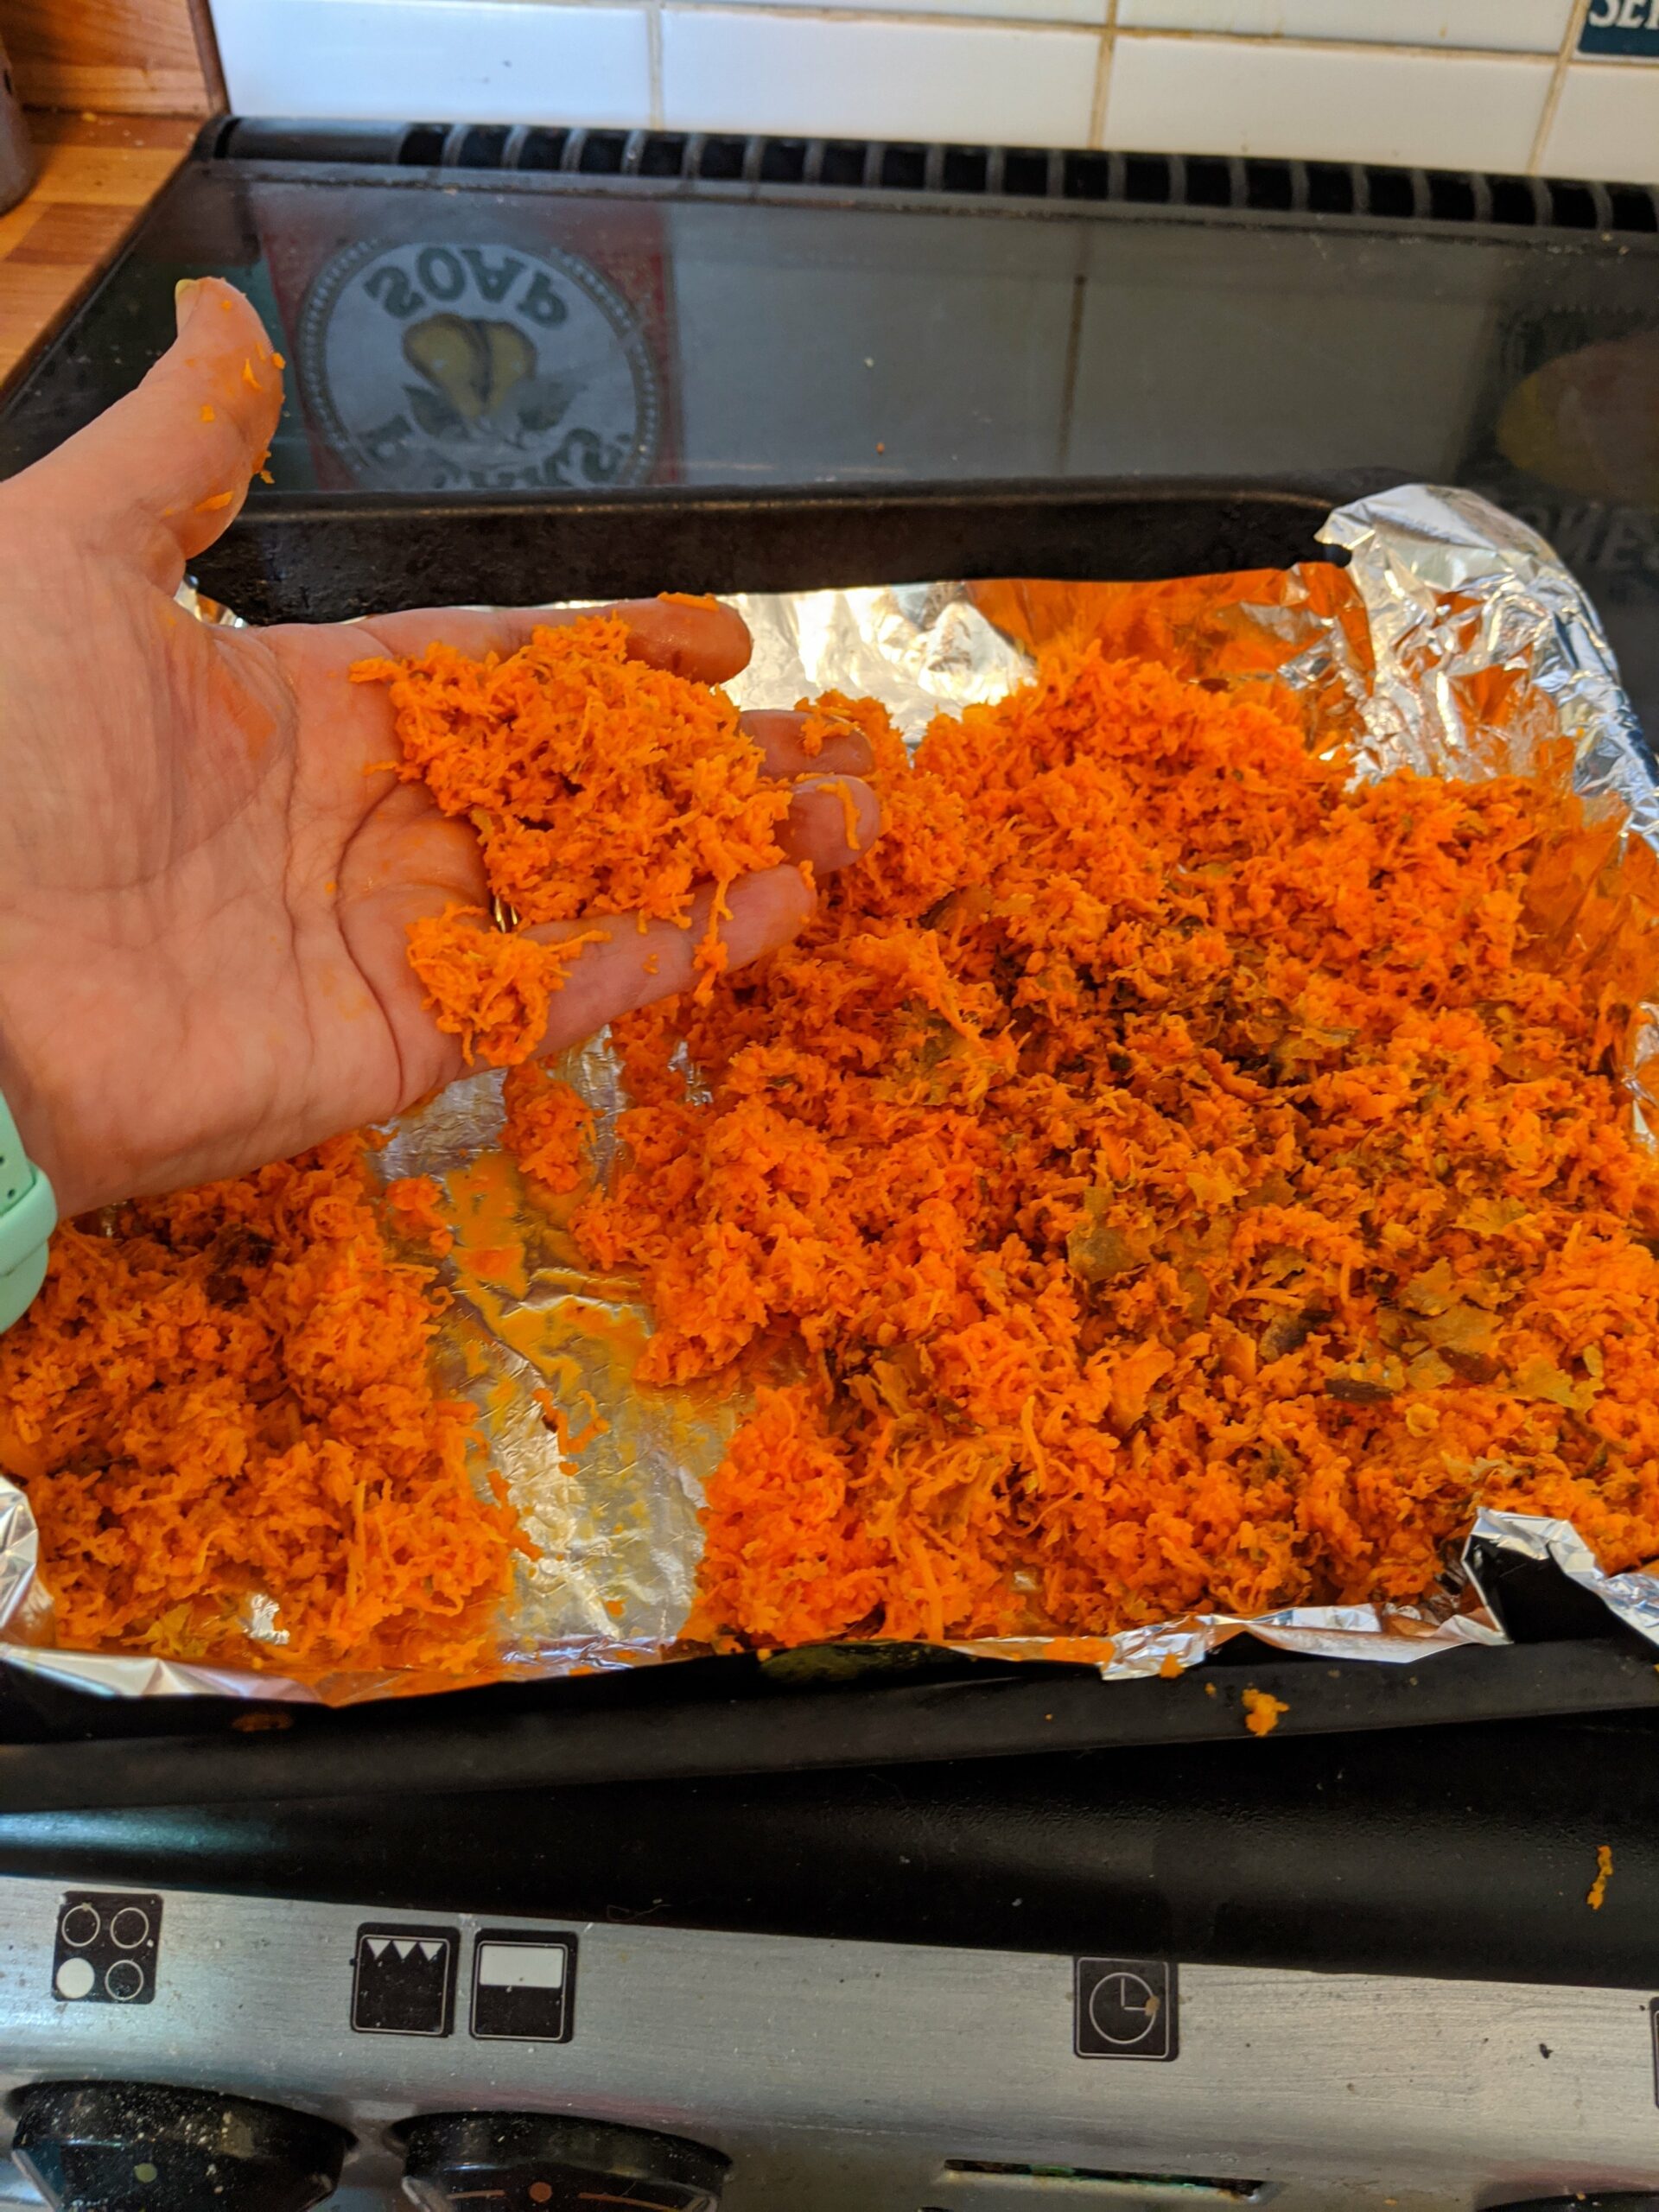
Another day of grating Turmeric root for lacquer. After grating it goes into the oven on a low heat for about 12 hours or until bone dry. Turmeric powder you buy from the supermarket just doesn’t give the same depth of colour.
This little Baker with an adjustable tube didn’t have much wrong with it, a few scratches to the paint, a loose rack and stuck centering screws on the condenser. Rennaissance decorroder sorted out the stuck centering screws and the rest was spit and polish and a little gentle adjustment. I really must iron my photo background…

I have recovered reasonably well from my health issues and I am now on the mend. This can only mean one thing – microscopes need lacquering, paint needs polishing and life continues. I’m about to start on a little Bausch and Lomb, I shall post pictures tomorrow, It’s mostly paint work that needs doing. Soon, my little friend, you will be shiny again.
I have had, what used to be described as a nervous breakdown. I find the term quite apt, much more descriptive than “mental health issues” which seems to me to avoid any hint of pain. My very lovely psych team are attempting to sort my brain out but it seems to be taking longer than expected. It’s taken me many months even to be able to post this. Hopefully I will get back on track eventually.
I could just keep quiet because I really don’t want to seem like I’m making a fuss or seeking sympathy but equally, breakdowns and mental illness should be talked about. My psych dudes are excellent, unfortunately it’s not like the common cold or even the flu and it can’t be remedied by a few kind words. They are convinced that it can be remedied though, and I trust them.
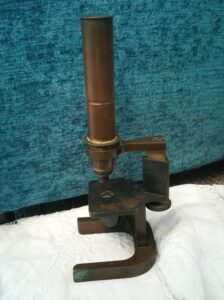
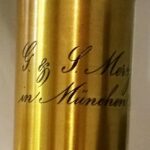
I have been restoring this lovely little Merz microscope, it’s a very special, rare microscope so I want to be careful not to over-restore it.
Below is a picture of it as it started out, as you can see it is fairly grubby. The stage has lost a great deal of its chemical blacking and there is verdigris on the foot where there is paint missing. There is no lacquer on the tube and the metal has become extremely dark. Of course, many people like the look of patinated brass, but to me, a completely blackened piece of brass is beyond a patina and certainly isn’t what the original maker would have wanted.
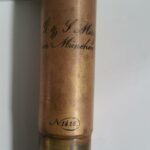
The first step in the restoration process is to clean the microscope inside and out. Corroded screws and small parts were placed in an extremely mild metal de-corroder. Larger parts were cleaned carefully by hand using decorroder or pre-lim as appropriate. Below you can see the tube in various stages of cleaning. Note that once the tube is cleaned you can actually see the guide lines the engraver used to keep his lettering a consistent size!
I have got to this point without using any harsh abrasives – no sandpaper, no polishing, nothing that removes any metal. Just de-corroder and pre-lim. Whilst there is still a very small amount of staining and a few small pits I did not remove them and went straight to a very, very, light straight-graining followed by lacquering.
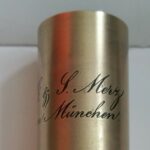
The finished tube. You can still see the engraver’s guide lines and note that the un-lacquered parts of the microscope tube have been cleaned but have not been polished or otherwise altered.
Now for the paint, the paint is a mixture of dark umber and ochre pigments ground on a ground glass sheet with a muller. Linseed oil is added until a paste is formed, it takes a long time to get rid of all the lumps. The linseed and pigment paste is then thinned with tung oil and turpentine. Tung oil dries better than linseed alone and gives a higher gloss.
I have not re-blackened the stage as I do not want to take away all signs of age and character. There are a couple of deep scratches on the stage though which look to be fairly recent and I shall probably blend them in a bit by blackening just the troughs of these scratches which are currently showing bright brass. I can do this by thickening the blackening chemical with PEG and painting it into the scratch marks with a very fine artist’s brush in much the same way engraver’s fill their work. That way it won’t affect the rest of the stage.
In the next post I shall show the reassembled microscope, right now the paint is drying.
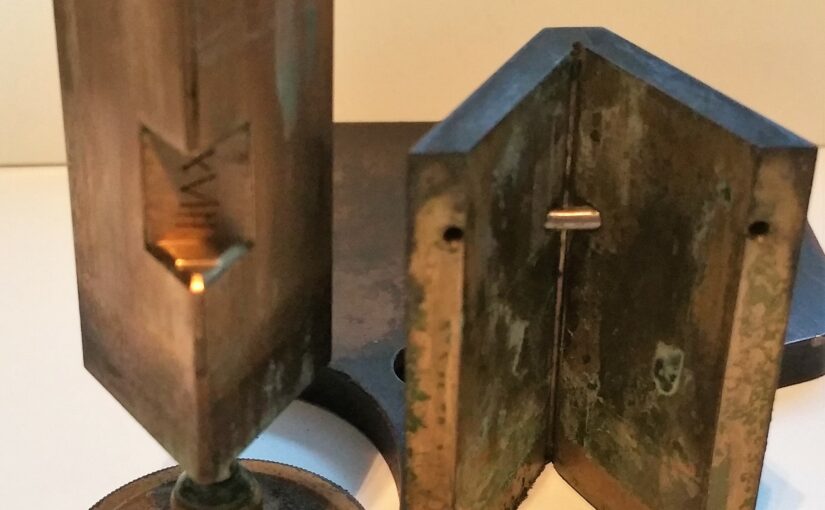
The Merz has an interesting design, and not one I have seen before. Most microscopes of this age and style have a solid round bar through which a triangular bar passes. The triangular bar has a screw at one end and a spring at the other and it’s a very effective, simple fine focus mechanism.
The Merz has a rather different set up – it also has a triangular block with a screw at one end and a spring at the other, but instead of passing through a round bar, the triangular block passes through another triangular piece. The outer triangle is constructed from pieces of flat brass which have been joined together by brazing – this might explain why Merz painted these parts rather than lacquering them I think. Using brazed pieces of brass would have saved a lot of wastage and money and it would easily have been strong enough.
A “typical” round Baker fine focus block on the left, the Merz brazed, triangular fine focus mechanism on the right.
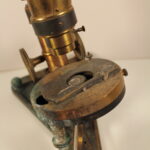
Travel could only have occurred in a small area. The solid triangular bar has a cut out area and a small bar is inserted through the corner of the brazed piece which acts as a stop. The pictures make it much easier to understand.
I have so many lovely microscopes that need work and I am like a child in a sweet shop, I don’t know which to do first! I’m overwhelmed with wonderful choices and I need to make a decision. I would like to get something underway this week. I have a beautiful double pillar microscope which needs a screw making and a bit of a clean but I don’t really think it needs re-lacquering. Do let me know if you agree/disagree with this opinion. I enjoy re-lacquering more than anything else so I shall probably leave the double pillar for another day when I’m in more of a making screws mood.
I have the Merz which is simple to do and in need of lacquering, I have “the Beast” which is huge and will take many months to do. a selection of small Hartnacks and the like and a rather nice jug handled microscope which has been painted completely black and really needs some love. When I say it has been painted black, I mean completely painted black – even the objectives. Poor little thing.
I think I’ll start with the Merz and then move on to the jug handled microscope. Decision made. If I don’t post pictures of a dismantled microscope tomorrow feel free to come and beat me with a big stick.
There are lots of pictures to look at today, I have been putting the little Merz under the microscope to check whether it was painted brown or whether it was chemically coloured and then lacquered. I compared the brown foot of the Merz with chemically blackened areas on the Merz and with the paint and lacquer of a very old Reichert that I had to hand. I also looked at a microscope I lacquered myself to see how my lacquering compares to the masters! I used a trinocular Olympus SZ stereomicroscope and a Canon EOS 1100D
First, two pictures of the brown areas on the Merz. Click thumbnails to enlarge.
The picture of the left shows what a small scraping of the “paint” looks like. This scraping was made near the area of corrosion which will have to be replaced anyway. The picture on the right show some intact “paint”
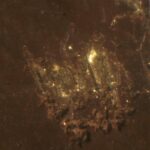
It certainly looks like paint although it is an extremely thin layer. For comparison here are another two pictures. On the left, a chemically blackened area on the Merz, on the right the paint on the foot of a Reichert.
BELOW: The rather interesting pattern made in the “paint” by the corrosion is shown on the left, in the centre is the lacquer on a lovely old reichert and on the right is some of my own lacquering. I’m pleased to say that the surface looks correct. the underlying metal on the piece I did is in worse shape but that is to be expected. It was heavily corroded when I got it. I wouldn’t have needed to lacquer it if it had been in the same condition as the Reichert.
I’m thinking that the microscope was painted, I can see brush marks in one area which also makes me think it was painted rather than chemically coloured/lacquered but it is quite hard to be sure. It could be that the chemical colouring has somehow soaked into the lacquer and coloured it. I may have to consult Henley’s 20th century recipes to check a few old methods of chemically colouring brass before I start doing anything drastic.
I wish I had a mass spectrometer. I asked my husband, he said he’d put it on the shopping list and that as long as they have them in Tesco he’ll get me one.
Pb or not Pb? that is the question. Pb is the chemical symbol for lead, today I shall be talking about lead. Hilarious aren’t I? ( please don’t answer that).
I have a new baby to work on. You can see below that it has a patch of corrosion on the foot which has to be treated before if spreads. I shall treat it with a gentle rust remover, sand the area and prime before painting. Here’s the tricky bit – I like to use ingredients and techniques that are as authentic as possible. I am pretty sure that the original maker would have used a lead oxide primer. I can’t buy lead oxide primer and although I can buy lead oxide powder, it is very expensive and it’s not a clever thing to be working with. Also, the chances of me ingesting some are quite high, because I tend to lick things if I don’t have a damp cloth to hand. I shall be using a commercially available non-ferrous metals primer instead, it won’t show underneath the paint anyway. Interestingly, I can see brush marks in the original paintwork so they weren’t being all that fussy.

I shall be starting on it as soon as some brown paint pigments arrive from my chums at Ingilby. I need to mix my own paint for this one. For a bog standard black and chrome 1950s – 1970’s microscope I tend to use black enamel paint. either Japlac or a reasonably high temperature coach enamel, sometimes with lacquer on top, sometimes not. This baby is special, it is also much older than 1950 and painted brown not black. Below is my paint mixing kit: pigments, linseed oil, a large ground glass sheet and a muller. Hopefully the brown pigments will arrive tomorrow.

My stamp arrived yesterday, it fits into my fly press and allows me to stamp my mark onto any brass items I make. I’m very pleased with it. It was made by two lovely chaps at Chalco Stamp and Die engraving in Wellingborough and looks so professional.
I can’t wait to use it on something. I plan to make a bullseye condenser in the next few weeks. A traditional feel for a contemporary item. Splendid.
Chalco can be found at their website here; chalco dies


This lovely little Baker jug handled microscope came to me in need of repair. The coarse focus pinion was horribly bent and the mechanical stage was sticking. The paint on the handle and the chemically blackened stage were very worn and a small area of paint on the on the foot was badly chipped.
The pictures below show the microscope before and after repair. Paint work renewed, stage blackened, pinion straightened and stage “un-stuck.” Nothing was re-lacquered
I am overjoyed and very honoured to have been granted an award by the Gane Trust, a charitable trust which gives grants and awards to people involved in crafts, design, social welfare and the arts. I have received a grant which will enable me to buy more hand files for producing small hand crafted brass items and spare parts.
Crofton Gane was a Quaker and a furniture maker who took great interest in craftsmen, he went to great lengths to encourage craftspeople, both young and old to develop their skills.
From the Gane Trust website:
In 1968 a fellow Quaker wrote “Crofton Gane’s main concern was that men should enjoy their work and find fulfilment in it. All his activities, spread over his long life, arose from his faith in man’s inherent dignity as a maker. He believed that man would come through because God is in him. He believed, therefore, in tomorrow. Beauty of form and excellence of craftsmanship were his delight.”
He was fascinated by fresh ideas and quick to give the word of encouragement, continually writing to people who were undertaking some creative service. To everything that was making a “contribution” (to use his favourite word) he was willing to give his great energy, his thought and his money.
I certainly feel encouraged, I hope Crofton Gane would have been pleased with my work if he could see it. I’m off to write a thank you letter now.
Juglone, a brown dye, is found in several consumer products, including hair dye formulations and walnut oil stain. Juglone is an active ingredient in dietary supplements prepared from walnut hulls. Walnut hull extracts and poultices have been used for many years in folk remedies.
Melting Point: 155 C (Merck, 1997)
Solubility: Slightly soluble in hot water; soluble in alcohol, acetone, chloroform, benzene, and acetic acid (Merck, 1997)
CHEMICAL IDENTIFICATION CAS Registry Number: 481-39-0 Chemical Abstracts Service Name: 1,4-Napthoquinone, 5-hydroxy-(8CI) Synonyms and Trade Names: Akhnot; C.I. 75500; C.I. Natural Brown 7; 5-hydroxy- 1,4-naphthalenedione;5-hydroxynaphthoquinone; juglone; regianin; walnut extract Structural Class: Bicyclic; napthoquinone