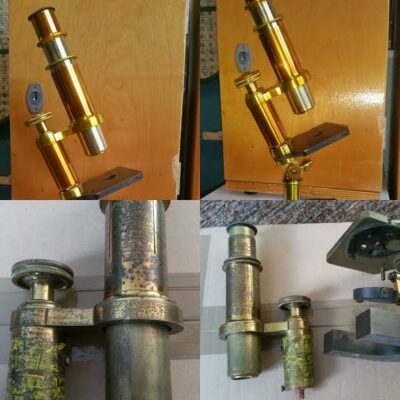
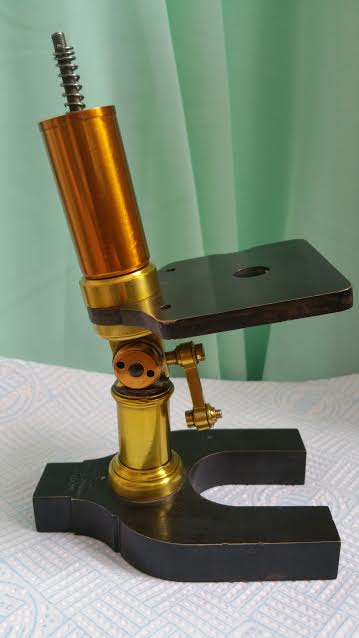
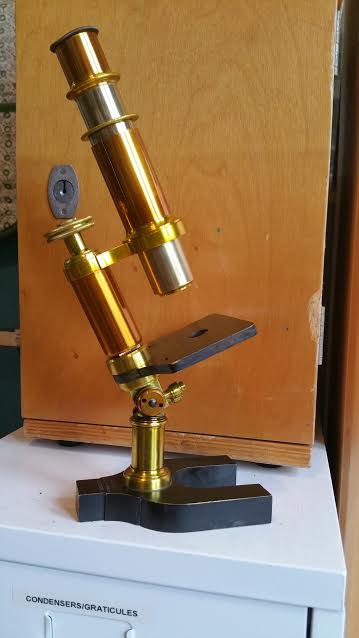
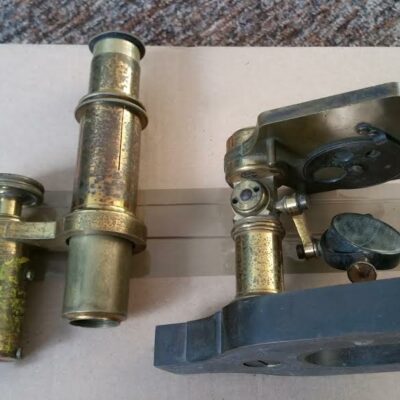
I’m still waiting for my walnut hulls to arrive (damn you bank holiday) but I thought I’d try mixing some alcohol dyed with coffee in with some lacquer while I wait. I am NOT going to use coffee in microscope lacquer but it does give me an indication of the kind of colour I might achieve when the walnut arrives. Coffee in the lacquer gives exactly the colour I want. Hurry up Post-lady! Bring me my walnut!
Tag: restoration
Walnut, yes!
Cloth is either made from plant material (cottons, flax) or animal materials (wool, silk, leather). When dying these materials you need mordants – additives that help the colour grab on to the material and set it in place. It’s a complex art and experts are known as Master Dyers for good reason. The colour you get depends on pH and the type of mordant used. Common mordants are alum, iron sulphate, copper sulphate, tin chloride and tannic acid. A dye may be brown with one mordant but green when used with a different mordant, and the type of fabric used also effects the colour. There’s a lot of information out there about using natural dyes on both wood and textiles but getting the colours right on metal lacquer is rather different.
Natural dyes are usually used in water and can react very differently in an alcohol and shellac mixture. Some simply won’t work (onion skins for instance) and others colour the solvent incompletely, or float to the surface of the lacquer and wash off (wood dyes are particularly bad for this, even those that are sold as alcohol soluble). Bismarck brown, a common Victorian stain, produces a brown/red colour when used as a wood stain but is scarlet when used in lacquer. It doesn’t adhere well either…
Brass contains copper and zinc but when you restore an old microscope you never know quite how much of each you are dealing with. Even though you are not really dying the metal, your lacquer sits on top of the metal, the zinc and copper content of the brass can still alter the colour of the lacquer. It can be tricky to know what will happen. You might apply a lacquer that appears to be a rich gold on a test piece of brass, but when applied to the antique microscope it comes out a dull yellow. It’s a pain. I have one lacquer which when it first goes on has a slight green tinge to it (possibly a reaction with copper) but after a week or so the green tinge dissipates and it turns yellow again. I haven’t quite figured this out but I think the green copper complex is unstable. It degrades in daylight. It only happens on old brass, not new brass – just to add another layer of mystery.
Why bother, you ask? Why not buy a can of spray on nitrocellulose lacquer?
Why? because I like things to be done properly and I don’t want every microscope I restore to look exactly the same as the previous one. Different makers used different colours. Different lacquer batches from the same maker were different colours. Lacquer colours changed with fashion. Some early Watson microscopes used a deep orange gold lacquer, later ones were very pale. There was a lot of variation and considerable beauty. I like to restore things using the same ingredients as were used originally. If you don’t do that then you are not restoring anything, you are doing a bodge job. You wouldn’t use acrylic paint on the Mona Lisa would you? (God forbid she ever gets damaged). You might use a brush with a plastic handle, or maybe artificial bristles (if you can make the same brush strokes) but you wouldn’t use modern paints. Besides, it’s fun. Research is fun and experimentation is fun.
‘No synthetic dye has the lustre, that under-glow of rich colour, that delicious aromatic smell, that soft light and shadow that gives so much pleasure to the eye. These colours are alive.’ Violetta Thurston
As I have already said, not all dyes are created equal. Some are particularly wonderful. Dyes such as turmeric are known as substantive dyes, they don’t need mordants to adhere to fabric and they are not too temperamental in lacquer. In fact they are very, very reliable. Turmeric is the basis for almost every lacquer I make and it never fails to be yellow. Obviously, being a natural product there is some variation in the intensity of the yellow but it is always, without fail, yellow.
Today I had a small breakthrough, I have a tiny piece of a microscope which I repaired for a customer. The piece is repaired but the repair damaged the lacquer so I have to colour match and re-lacquer. This lacquer is a smoky gold colour. Warm gold with a tiny hint of brown. I have tried all sorts of ways to get browns and whilst I have had some success, I have not yet found a reliable source of brown which I can mix with other dyes. There are modern dyes, but I want to stick with products which were commonly used in the Victorian era.
I was browsing textile dying websites for inspiration when I stumbled across black walnut hulls. Walnut! Of course! They used to make ink for pens from walnut hulls. It was a VERY common ingredient in the Victorian era. I would be amazed if they didn’t use it. I have some water based walnut hull ink in the cupboard and it is a lovely nutty brown. A little research and I discovered that walnut is also a substantive dye that is brown in both alcohol and water. I’m waiting for walnut hulls to arrive from eBay. I am very keen to test it out. I don’t know why I didn’t think of it before!

Here we go…
Here is the Baker microscope with the bent pinion all taken apart. Since taking the photo I have cleaned it, sanded some areas and primed them ready for painting. Tomorrow I shall blacken the stage and do some more sanding and painting. I shall repeat this process about 10 times. It will be worth it in the end.

Stage and paintwork
A customer has asked me to partially restore his microscope, a jug handled Baker. He has specified certain areas that he wants repaired as he wishes to conserve as much of the original paint as possible. He wants me to re-do several areas of the handle, an area on the foot, and the stage. The stage is a little stiff in one direction so the movement needs looking at too.
As you can see, I will also have to make a new pinion as the original pinion attached to the coarse focus is badly bent. Here’s the before photograph – let’s see what we can do! I’ll start by giving it a good clean as it is very dirty.
Perfectionism
Today I have re-lacquered the same piece three times. The first time I did it it came out too orange. I stripped off the lacquer, diluted it and tried again. The colour was better but after staring at it for some time I decided it was still not quite right for the era.
I stripped one piece and I made a further dilution of my lacquer then did a rough and ready re-lacquering of a test area. The colour is better now but I shall have to do the piece properly next week. I am getting impatient and making mistakes now. It’s better to wait.

Re-lacquering a piece numerous times seems to be par for the course. I seek perfection in colour, in shininess and in all round wow factor. No point lacquering a piece absolutely beautifully but in the wrong shade of yellow. I have to feel proud when I have finished. I never feel relaxed if I know there is an error, or the colour isn’t quite right. I don’t suppose this is a bad thing.
Perfection!
A small two tone Baker microscope appeared on eBay some years ago and I was quite taken with its beauty so when I happened across a very badly damaged Baker in need of re-lacquering I decided to recreate the two tone look.
This little chap has been something of an experimental piece as I have tested various brown and orange lacquers out on it. I am finally happy with it. I just have two small pieces drying and I can reassemble it properly. The slideshow below shows the microscope before and after restoration.
My workshop
Today I have been tidying my workshop, it might look a bit of a mess still but I have removed a whole car-boot load of old boxes, used nitrile gloves and bits of emery paper today. The room is looking much tidier even if the worktops themselves still need some work. I shall finish tidying tomorrow – I need to use the milling machine so there is no escape!

I am still not entirely happy with the little Baker microscope in the foreground of the picture, the brown lacquer comes out far too dark after it has been heated. I am making a new, much paler batch at this moment. I want a muted earthy tone – not dark chocolate. I should have pictures to post at the weekend.
Polishing
I have been so busy polishing this week that I forgot to blog! I do all my polishing by hand and it can be quite therapeutic. The mind can wander a little while the hands are busy. Whilst polishing I tend to daydream about glistening golden microscopes and my next projects. Today I sanded and polished with various grades of pumice. I have one more extra fine polish to do before I start lacquering this piece, and tomorrow evening I have another piece to finish which just needs heating and reassembling.
The excitement mounts. I hope I can get it all done, I have to do some gardening to do as well. The penstemon need urgent attention.
Different lacquer colours
By varying the amounts of various ingredients, such as Dragon’s Blood, various lacquer colours can be achieved. Below is a picture showing three different batches of lacquer I have made applied to microscope parts.
I am about to make up a fresh batch of yellow as I have a piece to lacquer for a customer, I have some leftover yellow lacquer but I don’t want to risk using it. The lacquer ingredients are dissolved in pure ethanol, over time the ethanol takes up water and water is death to lacquer. Any water in your lacquer and you will get cloudiness and a nasty finish. It’s less trouble to make up fresh.

The lacquering line

Not something you see every day -my lacquering washing line. It’s important not to touch the lacquer after it is applied. It needs to dry for several days before being cooked. This re-purposed Ikea wardrobe makes a fine drying cupboard. The wardrobe doors are a good cat deterrent too. Nothing worse than cat hair in the lacquer. I wonder how Victorian microscope makers kept their cats at bay?
I use stiff flexible lubricant hosing and crocodile clips to hold the work while I lacquer it. Once lacquering is complete I can bend the hose and hang it up in the wardrobe. Wire also works but the piece being lacquered can sometimes flop around too much, also wire is not unsuitable for tiny pieces like screws.
Brown lacquer
Today, I have been working with an unusual brown lacquer. Brown lacquers were not used a great deal, but it is good to have finally perfected one for those rare occasions when a brown lacquer is called for. The lacquer uses garnet shellac and is somewhat more tricky to apply than any of my yellow or gold lacquers. It is a fairly muted brown and needs to be applied in a slightly thicker layer than usual. Also, it is a damp, cold, dull day and lacquers are much easier to apply when there is bright light and low humidity.
It’s looking good, I am eager to see what it looks like once it has dried and has been cooked.


